
Forget everything you thought you knew about fall desserts, because I’m about to drop a flavor bomb on you: Apple Cider Whoopie Pies! These aren’t your grandma’s whoopie pies (unless your grandma is secretly a culinary rockstar, which, hey, maybe she is). We’re talking intense apple cider flavor packed between two ridiculously soft cookies and slathered with a maple cream filling that will make you weak in the knees.
My first bite of an Apple Cider Whoopie Pie was at a fall festival, and I remember thinking, “This is what autumn tastes like in a dream!” The combo of warm spice and tangy apple cider was unlike anything I’d experienced. It was the kind of treat that makes you close your eyes and savor every single bite.
That Apple Cider Whoopie Pie was good, but I knew I could make it epic. I spent weeks tweaking the recipe, playing with different spices and ratios, until I landed on pure perfection. We’re talking whoopie pies so good, they’ll have your neighbors lining up at your door!
This Apple Cider Whoopie Pie recipe is everything Cuba Queen stands for: BOLD flavors, unapologetic deliciousness, and turning everyday moments into a celebration. I’m so pumped to share this with you because I know you, my fellow flavor adventurer, will absolutely lose your mind over these! Get ready to transform your kitchen into a fall flavor fiesta! 🍎🔥
INGREDIENTS You Need for This:
- 3 cups all-purpose flour: This is the base for our cookies. Make sure it’s fresh for the best texture!
- 1 teaspoon baking soda: This gives our whoopie pies that signature rise and light, airy crumb.
- 1 teaspoon ground cinnamon: Hello, warmth and spice! Cinnamon is key for that cozy fall feeling in every bite of your Apple Cider Whoopie Pies.
- ½ teaspoon ground nutmeg: Don’t skip the nutmeg! It adds a subtle depth of flavor that complements the apple cider perfectly.
- ½ teaspoon ground cloves: Just a pinch of cloves adds a touch of warmth and complexity.
- ½ teaspoon salt: Balances the sweetness and enhances all the other flavors.
- 1 cup (2 sticks) unsalted butter, softened: The secret to tender, melt-in-your-mouth cookies.
- 1 ½ cups granulated sugar: Sweetness is a must!
- 2 large eggs: Binds everything together and adds richness.
- 1 teaspoon vanilla extract: Enhances the overall flavor profile.
- 1 cup apple cider: The star of the show! Use a good quality apple cider for the best flavor.
- ½ cup sour cream: Adds moisture and a slight tang that complements the apple cider flavor in these Apple Cider Whoopie Pies.
- For the Maple Cream Filling:
- 1 cup (2 sticks) unsalted butter, softened: Makes the filling smooth and creamy.
- 4 cups powdered sugar: Sweetens the filling to perfection.
- ½ cup maple syrup: The maple flavor takes the filling to another level of deliciousness!
- 2 tablespoons milk: Adjusts the consistency of the filling.
- 1 teaspoon vanilla extract: Adds a touch of warmth and sweetness.

The secret to Apple Cider Whoopie Pies that will blow your mind? Reducing the apple cider before adding it to the batter! This concentrates the apple flavor and prevents the cookies from becoming soggy.
You’ll find the best quality apple cider at your local farmers market or orchard. Splurge on this one ingredient – trust me, it makes a world of difference! If you’re feeling extra adventurous, try using brown butter instead of regular butter in the cookies. It adds a nutty, caramel-like flavor that’s absolutely divine.
This Apple Cider Whoopie Pie ingredient list is SHORT but mighty! If you’re short on time, you can use store-bought sour cream. Just make sure it’s full-fat for the best results.
STEP-BY-STEP INSTRUCTIONS:
- Reduce the Apple Cider: Pour the apple cider into a saucepan and bring to a boil over medium-high heat. Reduce the heat to medium and simmer for about 15-20 minutes, or until the cider has reduced to about ½ cup. Let it cool completely. This step is KEY to intensifying that apple flavor in your Apple Cider Whoopie Pies.
- Preheat and Prep: Preheat your oven to 375°F (190°C). Line baking sheets with parchment paper. Don’t skip the parchment paper! It prevents the Apple Cider Whoopie Pies from sticking.
- Combine Dry Ingredients: In a medium bowl, whisk together the flour, baking soda, cinnamon, nutmeg, cloves, and salt. This ensures all the spices are evenly distributed.
- Cream Butter and Sugar: In a large bowl, cream together the softened butter and sugar until light and fluffy. This usually takes about 3-5 minutes with an electric mixer. Pro tip for Apple Cider Whoopie Pie perfection: make sure your butter is truly softened, not melted.
- Add Eggs and Vanilla: Beat in the eggs one at a time, then stir in the vanilla extract.
- Alternate Wet and Dry Ingredients: Gradually add the dry ingredients to the wet ingredients, alternating with the reduced apple cider and sour cream, beginning and ending with the dry ingredients. Mix until just combined. Don’t overmix! Overmixing can lead to tough Apple Cider Whoopie Pies.
- Drop by Rounded Tablespoons: Drop rounded tablespoons of batter onto the prepared baking sheets, leaving about 2 inches between each cookie. In my kitchen, this Apple Cider Whoopie Pie batter takes exactly 12 minutes to bake to perfection.
- Bake: Bake for 8-10 minutes, or until the edges are lightly golden and the tops spring back when lightly touched. Your Apple Cider Whoopie Pies should smell like a fall dream!
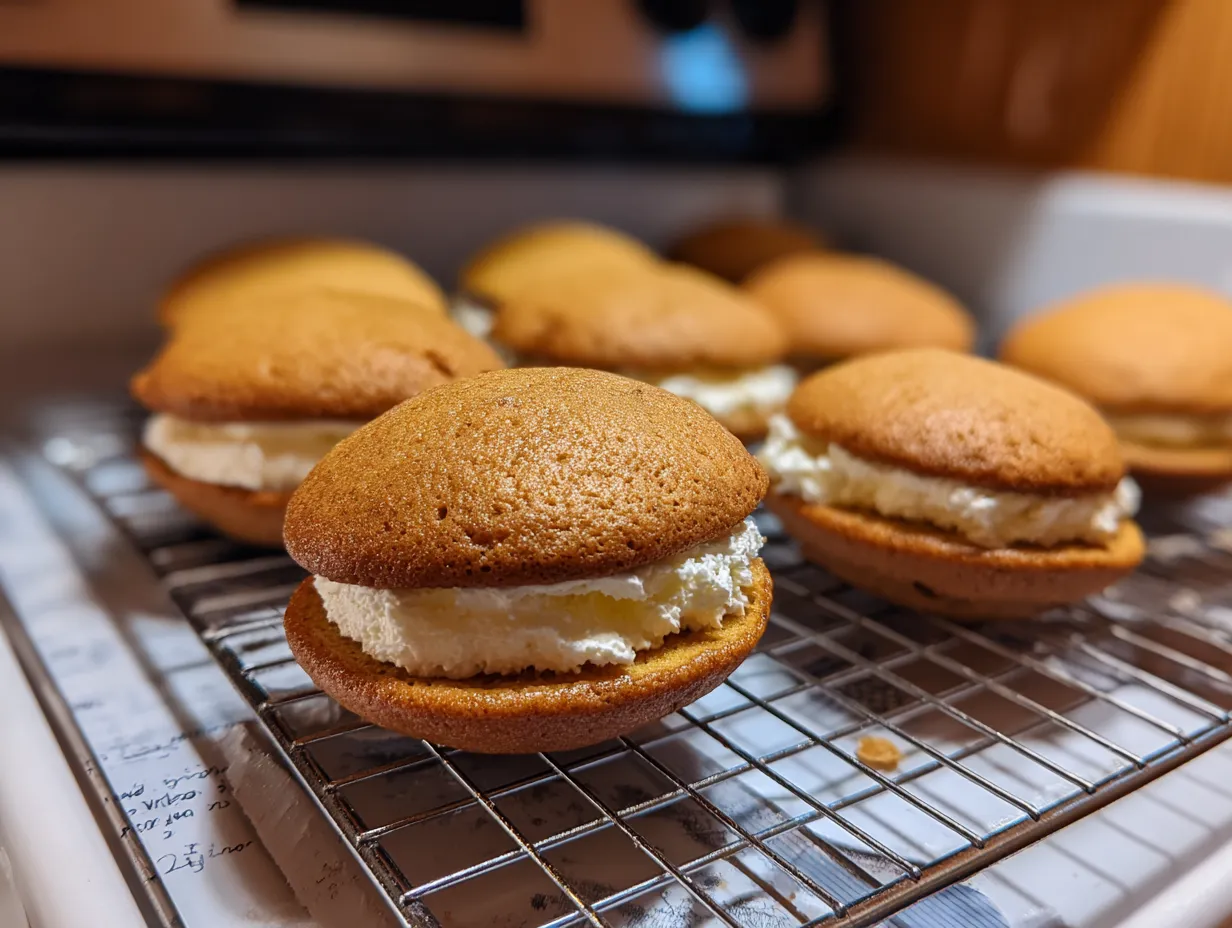
- Cool Completely: Let the cookies cool on the baking sheets for a few minutes before transferring them to a wire rack to cool completely. This is crucial! If you try to fill them while they’re still warm, the filling will melt.
- Make the Maple Cream Filling: While the cookies are cooling, make the maple cream filling. In a large bowl, cream together the softened butter and powdered sugar until light and fluffy.
- Add Maple Syrup, Milk, and Vanilla: Beat in the maple syrup, milk, and vanilla extract until smooth and creamy.
- Assemble the Whoopie Pies: Once the cookies are completely cool, spread a generous amount of maple cream filling on the flat side of one cookie and top with another cookie, flat side down. Gently press together to sandwich the filling.
- Chill (Optional): For best results, chill the Apple Cider Whoopie Pies in the refrigerator for at least 30 minutes before serving. This allows the filling to firm up and the flavors to meld together.
Here’s where most people mess up their Apple Cider Whoopie Pies – but not you! Make sure your oven is properly calibrated and that you’re using the correct measurements for all ingredients. Precision is key!
While your Apple Cider Whoopie Pies are working their magic, grab your camera – this is Instagram gold! Seriously, these beauties are totally photogenic.
PRESENTATION:
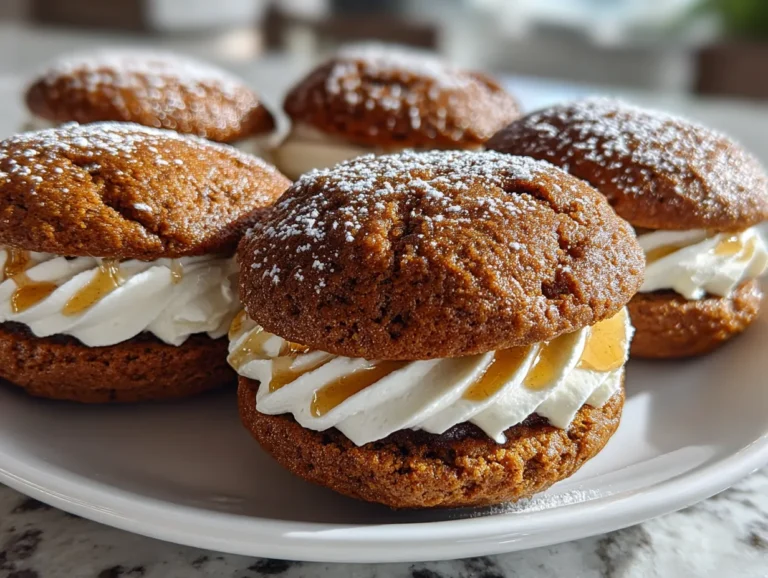
These Apple Cider Whoopie Pies deserve a presentation as epic as their flavor! Dust them with a light coating of powdered sugar for a snowy, elegant look. Or, drizzle them with extra maple syrup for a sticky-sweet treat.
People absolutely lose their minds when I serve these Apple Cider Whoopie Pies at potlucks and fall gatherings. They’re always the first dessert to disappear!
For a bold pairing, serve these with a scoop of vanilla bean ice cream or a warm mug of spiced apple cider. And if you’re feeling extra fancy, try crumbling some candied pecans over the top for added crunch and flavor.
These Apple Cider Whoopie Pies absolutely slay at Thanksgiving and holiday parties! They’re a guaranteed crowd-pleaser.
Got leftovers? (Highly unlikely, but just in case!) Crumble the Apple Cider Whoopie Pies over a bowl of yogurt or oatmeal for a delicious and festive breakfast treat. I have also seen the Apple Cider Donut Whoopie Pies! #manchesternh at a farmer’s market, and think that is an excellent way to show presentation of the recipe.
For a seasonal variation, try adding a pinch of pumpkin pie spice to the batter for a pumpkin-apple cider combo. I also love making cinnamon whoopie pies by adding a bit more cinnamon to the batter.
FAQs:
- Can I make these ahead of time? Absolutely! These Apple Cider Whoopie Pies are even better the next day, as the flavors have had time to meld together. Just store them in an airtight container in the refrigerator.
- Can I freeze these? Yes! Wrap them individually in plastic wrap and then place them in a freezer-safe bag or container. They can be frozen for up to 2 months. Let them thaw completely before serving.
- What if I don’t have apple cider? While apple cider is the star of the show, you can substitute apple juice in a pinch. Just be sure to reduce it for a longer time to concentrate the flavor.
- Can I make this spicier? Go for it! Add a pinch of cayenne pepper to the batter for a little kick. Or, increase the amount of cinnamon, nutmeg, and cloves to taste.
- How do I know when my cookies are perfectly done? The edges should be lightly golden and the tops should spring back when lightly touched. Be careful not to overbake them, or they’ll be dry.
- What if my filling is too thin? Add more powdered sugar, a tablespoon at a time, until it reaches the desired consistency.
- Can I use a different filling? Of course! Get creative and try different fillings like cream cheese frosting, chocolate ganache, or even a simple vanilla buttercream. The maple cream filling is my favorite! There is also a pumpkin whoopie pies with maple marshmallow cream – Husbands … that is a really creative idea!
- What if I don’t have sour cream? Greek yogurt is a great substitute!
Remember, these Apple Cider Whoopie Pies are all about having fun and experimenting with flavors. Don’t be afraid to put your own spin on the recipe and make it your own!
CONCLUSION:
This Apple Cider Whoopie Pie recipe represents everything Cuba Queen stands for: bold flavors, unforgettable experiences, and turning ordinary moments into a celebration. It’s a flavor adventure that will transport you to a cozy fall day, no matter the season.
My Apple Cider Whoopie Pies Power Tips:
- Reduce the apple cider: This concentrates the flavor and prevents soggy cookies.
- Don’t overmix the batter: Overmixing leads to tough cookies.
- Chill the whoopie pies: This allows the filling to firm up and the flavors to meld.
I’ve also created and loved several variations of the Apple Cider Whoopie Pies. The pumpkin whoopie pies version is always a hit around Halloween. Then I made fall whoopie pies that had a mix of cinnamon, nutmeg, and ginger, which gave them a real fall vibe. And don’t even get me started on my apple cider cookies – amazing!
I am always looking for “Can apple cider donut whoopie pies sell in November and December?]?” The answer is yes, they are popular then!
Which Apple Cider Whoopie Pies version gets the biggest reactions? Definitely the one with a hint of caramel in the filling!
I have complete confidence that you, my fellow flavor adventurer, will create an Apple Cider Whoopie Pies masterpiece that will blow everyone away! Get in the kitchen and have some fun – I cannot wait to hear how it goes!
Make this Apple Cider Whoopie Pies your signature dish, the one that people ask for again and again. Share your results with me – I want to see your creations!
Let’s create some Apple Cider Whoopie Pie memories that will last a lifetime! Get cooking and let the flavor adventure begin! 🔥🌮✨
And if you want to keep the party going, don’t forget to check out my Caramel Apple Sangria Recipe and Halloween Whoopie Pies Treat for more bold flavor adventures! If this recipe rocks your world, you NEED to try my Apple Cider Cheesecake.
Apple Cider Whoopie Pies

These Apple Cider Whoopie Pies are a delightful fall treat! Soft, spiced apple cider cakes are filled with a creamy maple buttercream for a perfect balance of flavors.
- Prep Time: 25 minutes
- Cook Time: 10 minutes
- Total Time: 35 minutes
- Yield: 12 whoopie pies
- Category: Dessert
- Method: Baked
- Cuisine: American
Ingredients
- For the Cakes:
- 2 1/2 cups all-purpose flour
- 1 teaspoon baking soda
- 1 teaspoon ground cinnamon
- 1/2 teaspoon ground nutmeg
- 1/4 teaspoon ground cloves
- 1/2 teaspoon salt
- 1 cup (2 sticks) unsalted butter, softened
- 1 1/2 cups granulated sugar
- 2 large eggs
- 1 teaspoon vanilla extract
- 1 cup apple cider, reduced to 1/4 cup (apple cider concentrate)
- For the Maple Buttercream:
- 1 cup (2 sticks) unsalted butter, softened
- 3 cups powdered sugar
- 1/4 cup maple syrup
- 1/4 teaspoon salt
- 2 tablespoons milk or cream
Instructions
- Make the Apple Cider Cakes: Preheat oven to 375°F (190°C). Line baking sheets with parchment paper.
- In a medium bowl, whisk together flour, baking soda, cinnamon, nutmeg, cloves, and salt.
- In a large bowl, cream together butter and sugar until light and fluffy. Beat in eggs one at a time, then stir in vanilla extract.
- Gradually add the dry ingredients to the wet ingredients, alternating with the apple cider concentrate, beginning and ending with the dry ingredients. Mix until just combined.
- Drop rounded tablespoons of batter onto the prepared baking sheets, leaving space between each.
- Bake for 8-10 minutes, or until the edges are lightly golden and a toothpick inserted into the center comes out clean.
- Let cool on the baking sheets for a few minutes before transferring to a wire rack to cool completely.
- Make the Maple Buttercream: In a large bowl, beat butter until smooth and creamy.
- Gradually add the powdered sugar, beating until well combined.
- Stir in maple syrup, salt, and milk/cream. Beat until light and fluffy.
- Assemble the Whoopie Pies: Match up cakes of similar size. Spread a generous amount of maple buttercream on the flat side of one cake and top with another cake, flat side down.
- Repeat with remaining cakes and buttercream.
- Serve immediately or store in an airtight container in the refrigerator.
Notes
For an extra touch, dust the whoopie pies with powdered sugar before serving.