
Okay, flavor adventurers, buckle up because I’m about to drop my latest obsession on you: a Magic Candy recipe that’ll blow your mind. Seriously, I’ve been tinkering with this for weeks, and I’ve finally nailed the sparkle, the shimmer, and the downright deliciousness. Get ready to turn your kitchen into a flavor laboratory – Cuba Queen style!
You know I’m all about the big, bold flavors, right? Well, this Magic Candy recipe? It’s like a party in your mouth, but with added magic. We’re talking edible glitter, color-changing possibilities, and a sweetness that’ll make you wanna dance! And the best part? It’s surprisingly easy.
Forget boring desserts – we’re about to create edible masterpieces. I’m so stoked to share this Magic Candy recipe with you because it’s the perfect way to add a little extra oomph to any occasion, or, you know, just a Tuesday! 😉 Let’s do this!
INGREDIENTS You Need for This:
This Magic Candy recipe ingredient list is SHORT but mighty! We’re all about maximum impact with minimal fuss. This is the Cuba Queen way!
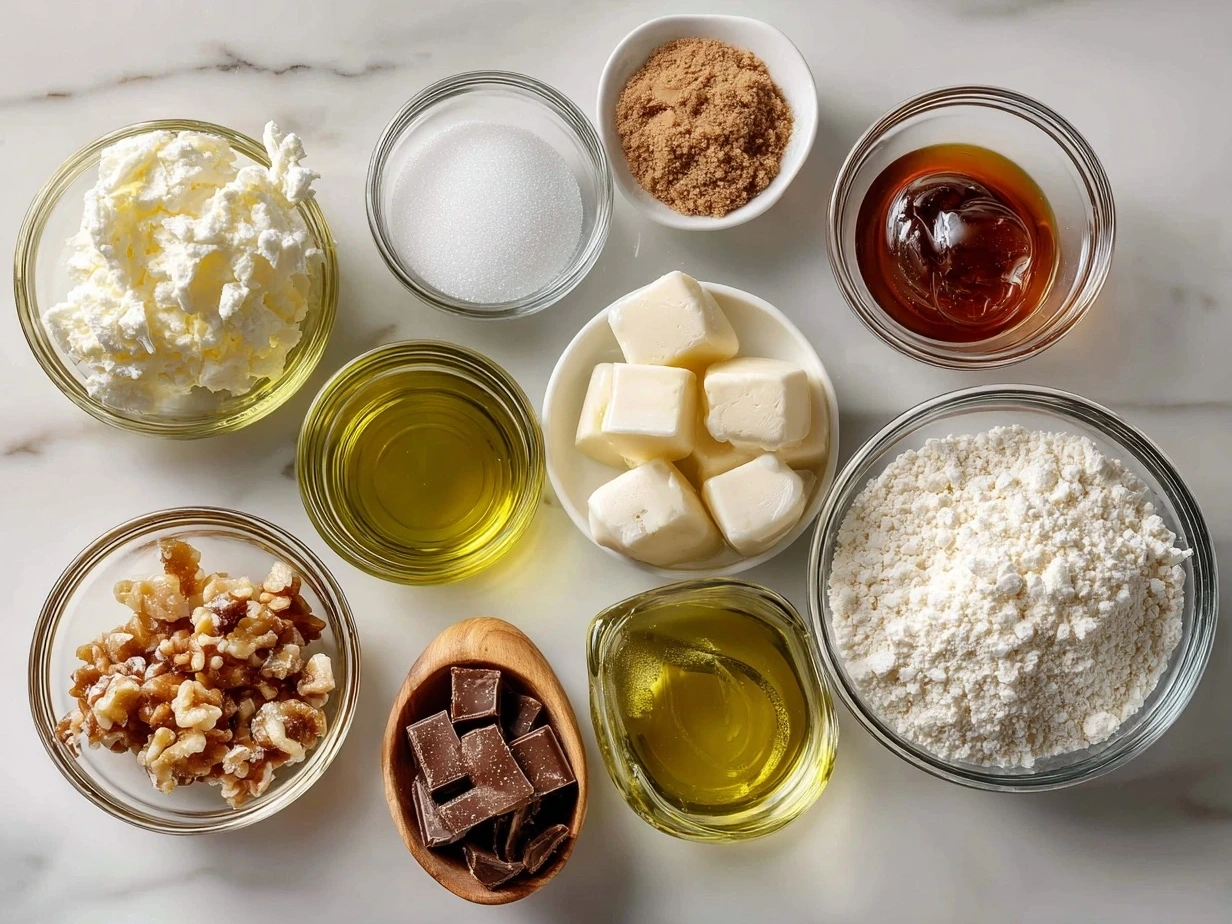
- 1 cup granulated sugar: Good ol’ white sugar is the base for our candy.
- 1/2 cup light corn syrup: This keeps the sugar from crystallizing and gives our Magic Candy recipe that beautiful, smooth texture.
- 1/4 cup water: Just plain ol’ water, but it’s crucial for dissolving the sugar.
- 1 teaspoon flavoring extract (vanilla, raspberry, lemon, etc.): This is where you get to play! I personally love raspberry for that tart kick.
- Gel food coloring: This is how we get those vibrant, eye-popping colors.
- Edible glitter or luster dust: This is ESSENTIAL for the magic! You can find amazing iridescent options online. I love the MONÉGASQUE Iridescent Edible Glitter.
- Optional: Color Changing Dust: Want to add a real wow factor? A touch of color changing dust adds an amazing appeal to this sparkle candy recipe!
The secret to an epic Magic Candy recipe is using gel food coloring instead of liquid. The gel gives you a much more intense color without adding extra liquid, which can mess with the candy’s consistency. The key is quality color and iridescence, something you can get from sparkle candy recipe guides.
You’ll find the best edible glitter for this Magic Candy recipe at specialty baking stores or online. Splurge on this one ingredient – trust me, it’s worth it!
STEP-BY-STEP INSTRUCTIONS:
Alright, flavor adventurers, let’s get cookin’! Follow these steps, and you’ll be rockin’ this Magic Candy recipe in no time. Don’t stress – your Magic Candy recipe is going to be incredible!
- Prep Your Station: Line a baking sheet with parchment paper. Have your food coloring, flavoring extract, and edible glitter ready to go. This Magic Candy recipe moves fast!
- Combine Ingredients: In a heavy-bottomed saucepan, combine the sugar, corn syrup, and water. Stir until the sugar dissolves completely.
- Cook to Hard Crack Stage: Clip a candy thermometer to the side of the pan, making sure it doesn’t touch the bottom. Bring the mixture to a boil over medium-high heat. Cook until the thermometer reaches 300°F (149°C), also known as the “hard crack” stage. This will give the Magic Candy recipe that crisp, satisfying snap!
- Remove from Heat: Once the candy reaches 300°F, immediately remove the saucepan from the heat. Be careful – this stuff is HOT!
- Add Color and Flavor: Quickly stir in your chosen food coloring and flavoring extract. Be careful when adding the food coloring, as it can splatter. Work quickly, because the candy starts to set up fast.
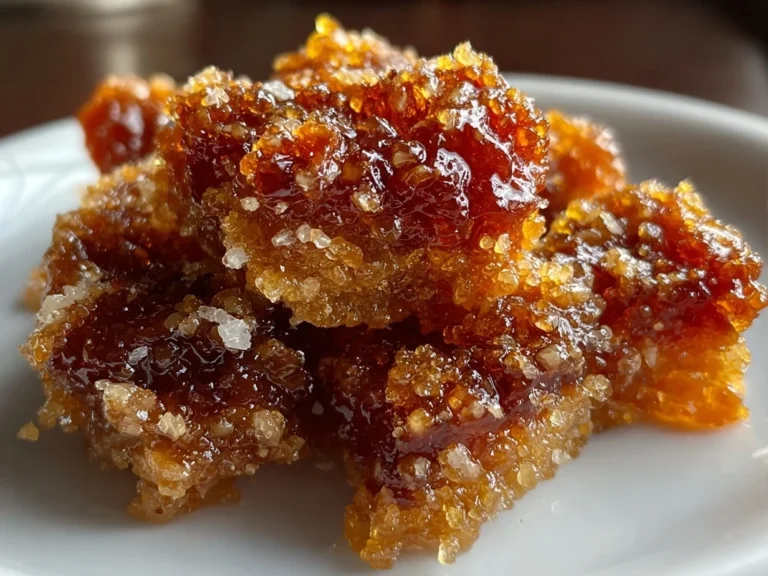
- Swirl in the Magic: Now for the fun part! Gently swirl in the edible glitter or luster dust. Don’t overmix; you want to see those beautiful sparkles throughout. This is where your Magic Candy recipe transforms into pure magic!
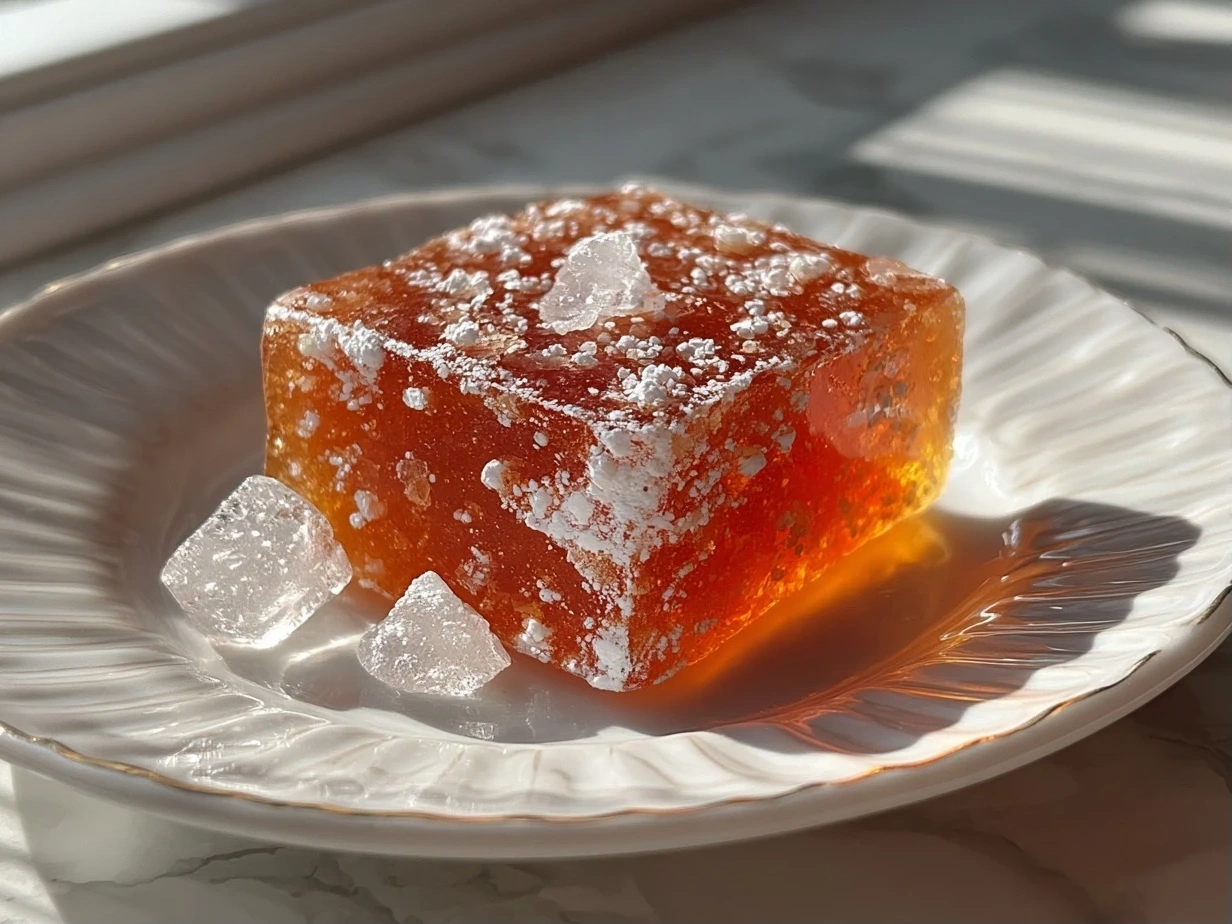
- Pour and Cool: Immediately pour the hot candy mixture onto the prepared baking sheet. Spread it out as evenly as possible.
- Let it Set: Let the candy cool completely. This usually takes about 30-45 minutes. Don’t touch it until it’s completely hardened.
- Break and Enjoy: Once the candy is cool and hard, break it into pieces. You can use a knife or just crack it with your hands. Store the Magic Candy recipe in an airtight container.
Pro tip for Magic Candy recipe perfection: use a silicone spatula to stir the candy. It’s heat-resistant and won’t scratch your pan. While your Magic Candy recipe is working its magic, grab your camera – this is Instagram gold!
Here’s where most people mess up their Magic Candy recipe – they don’t let it cool completely before breaking it! Be patient; it’s worth it. In my kitchen, this Magic Candy recipe takes exactly 37 minutes to cool perfectly.
PRESENTATION:
This is where you can really show off your creativity! Presentation is key for making this Magic Candy recipe a showstopper.
People absolutely lose their minds when I serve this Magic Candy recipe at parties! Arrange the candy pieces on a pretty platter or in a glass bowl. This Magic Candy recipe absolutely slays at dinner parties!
For an extra touch, you can dip the edges of the candy in melted chocolate and then sprinkle with more edible glitter. I like to pair this Magic Candy recipe with a scoop of vanilla ice cream or a decadent chocolate cake. Talk about a flavor explosion!
Perfect occasions for this Magic Candy recipe? Birthdays, holidays, or any time you want to add a little sparkle to your day. If you’re feeling extra fancy, try crushing the candy and using it as a topping for cupcakes or cookies. If you are looking to expand your candy options, consider trying this Magic Candy recipe along with Christmas Cracker Candy.
Looking for other ways to present this Magic Candy recipe? You can create little goodie bags with the candy as a party favor!
FAQs:
Got questions? I’ve got answers! Here are some common cooking challenges and my tried-and-true solutions for this Magic Candy recipe.
Q: Can I make this Magic Candy recipe spicier?
A: Absolutely! Add a pinch of cayenne pepper to the sugar mixture for a sweet and spicy kick.
Q: What if I don’t have corn syrup for my Magic Candy recipe?
A: You can substitute honey, but it will slightly alter the flavor. Try using a touch of lemon juice to keep it from being overly sweet!
Q: How do I know when my Magic Candy recipe is perfectly done?
A: The candy thermometer is your best friend! Make sure it reaches 300°F (149°C). If you don’t have a thermometer, drop a small amount of the candy into a glass of cold water. If it forms hard, brittle threads, it’s ready.
Q: Can I use different flavorings in my Magic Candy recipe?
A: Go wild! Experiment with different extracts like almond, peppermint, or even coffee.
Q: What if my Magic Candy recipe starts to crystallize?
A: This usually happens if sugar crystals cling to the side of the pan. Use a wet pastry brush to wash down the sides of the pan as the candy cooks.
Q: How do I store my Magic Candy recipe?
A: Store the candy in an airtight container at room temperature. It should last for several weeks.
Q: My candy is sticky! What did I do wrong?
A: It probably didn’t reach the hard-crack stage. Make sure to cook it to 300°F (149°C) to evaporate all the moisture.
I have customized the Magic Candy recipe to include color changing candy for a true magical feel.
CONCLUSION:
This Magic Candy recipe isn’t just about making candy; it’s about creating a moment of pure joy and sparkle. This recipe embodies everything Cuba Queen stands for: bold flavors, fun in the kitchen, and memories made together.
My Magic Candy Recipe Power Tips:
- Don’t Skip the Thermometer: It’s the key to perfect candy every time.
- Work Fast: Once the candy is ready, you need to move quickly before it sets up.
- Embrace the Sparkle: Don’t be shy with the edible glitter! More is more!
I’ve created so many amazing versions of this Magic Candy recipe. My personal favorite is the raspberry with rose gold glitter. The edible glitter and Unicorn Syrup really add something extra. If you are looking to add a little frozen fun to your edible glitter recipes, check out these great recipes. The Unicorn Ice Cream Recipe with Edible Glitter and Unicorn Syrup look amazing!
Other variations I love include lemon with silver glitter, and peppermint with red and green glitter for the holidays. The raspberry version of this Magic Candy recipe always gets the biggest reactions.
I’m so confident that you’re going to rock this Magic Candy recipe! Get ready to impress your friends and family with your newfound candy-making skills. The results are delicious and it’s an easy shimmering sweets recipe!
Now go forth and create some Magic Candy recipe memories! And don’t forget to share your creations with me! Tag me in your photos so I can see all your sparkling masterpieces. The iridescence that makes this Magic Candy recipe something that everyone will love!
\n \n Print
Magic Candy recipe
This Magic Candy is a delightful treat that magically transforms in your mouth! It’s a fun and easy recipe perfect for kids and adults alike, creating a sweet and memorable experience.
- Prep Time: 5 minutes
- Cook Time: 15 minutes
- Total Time: 20 minutes
- Yield: About 20 pieces
- Category: Dessert
- Method: No-Cook
- Cuisine: American
Ingredients
- 1 cup granulated sugar
- 1/2 cup light corn syrup
- 1/4 cup water
- 1/4 teaspoon flavoring extract (vanilla, peppermint, etc.)
- Food coloring (optional)
- Powdered sugar, for dusting
Instructions
- In a medium saucepan, combine granulated sugar, corn syrup, and water.
- Cook over medium heat, stirring constantly, until the sugar dissolves.
- Continue cooking without stirring until the mixture reaches the hard-crack stage (300-310°F or 149-154°C) on a candy thermometer.
- Remove from heat and quickly stir in flavoring extract and food coloring (if using).
- Pour the mixture onto a lightly greased baking sheet or silicone mat.
- Let it cool completely until hardened.
- Break the candy into small pieces.
- Dust with powdered sugar to prevent sticking.
Notes
For extra fun, try swirling different colors of food coloring together! Store in an airtight container at room temperature.