

Okay, flavor adventurers, get ready to lose your minds! I was at my Abuela’s house, trying to recreate one of her old recipes, and it was a total flop. Feeling defeated, I grabbed the ripest bananas I could find and threw together something sweet. Then, BAM! I poured in some maple syrup (because, duh, maple anything is amazing), and it was a revelation. Seriously, I almost cried. This Maple Banana Bread is not your average, boring loaf. It’s a flavor bomb. A freaking masterpiece.
This Maple Banana Bread is everything Cuba Queen stands for – bold, unapologetic flavor that turns a regular day into a fiesta! I’ve been perfecting this recipe for months, taste-testing every single batch (it’s a tough job, but someone’s gotta do it!), and I’m finally ready to share it with you. Get ready to experience Maple Banana Bread like never before. Let’s get baking!
INGREDIENTS You Need for This:
This Maple Banana Bread ingredient list is short but mighty! We’re talking pantry staples with a few key twists that’ll send your taste buds into overdrive.
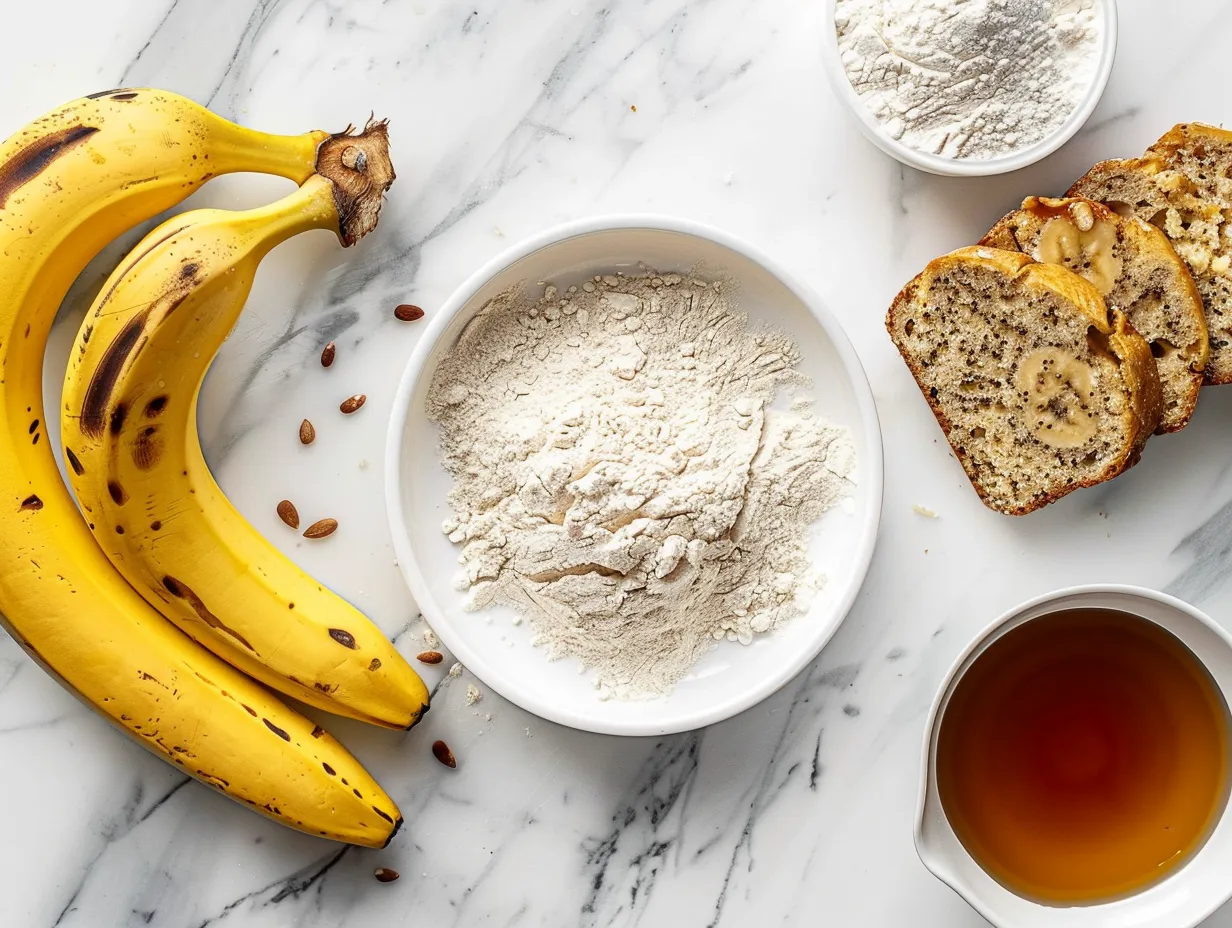
- 3 very ripe bananas, mashed: The riper, the better! Those brown spots are flavor gold.
- ⅓ cup melted coconut oil: This adds moisture and a subtle nutty flavor. You can find great coconut oil at any health food store, but any grocery store will do in a pinch.
- ½ cup real maple syrup: This is the star! Don’t skimp on the good stuff. The real maple syrup for this Maple Banana Bread adds depth and complexity that imitation syrup simply can’t match.
- 1 large egg (or flax egg for vegan): This helps bind everything together.
- 1 teaspoon vanilla extract: A little vanilla goes a long way in enhancing the other flavors.
- 1 ½ cups all-purpose flour: Keeps it simple and reliable.
- 1 teaspoon baking soda: For that perfect rise.
- ½ teaspoon salt: Balances the sweetness.
- ½ cup chopped walnuts or pecans (optional): For added crunch and nutty flavor. You’ll find the best nuts for this Maple Banana Bread at your local farmer’s market, trust me!
The secret to epic Maple Banana Bread is using REALLY ripe bananas. Like, almost-too-far-gone ripe. Trust me, they bring the sweetness and moisture that makes this bread a total winner. I always buy extra bananas and let them sit on the counter until they’re perfect for baking. And if you’re feeling extra fancy, splurge on organic maple syrup! It’s a game-changer.
STEP-BY-STEP INSTRUCTIONS:
Alright, flavor adventurers, let’s get this Maple Banana Bread party started! These steps are simple, but follow them closely, and you’ll be rewarded with a loaf of pure deliciousness.
- Preheat your oven to 350°F (175°C) and grease a 9×5 inch loaf pan. Don’t skip the greasing! You don’t want your beautiful Maple Banana Bread to stick.
- In a large bowl, mash those ripe bananas until they’re nice and smooth (or slightly chunky, if you prefer).
- Add the melted coconut oil, maple syrup, egg (or flax egg), and vanilla extract to the mashed bananas. Mix well until everything is combined.
- In a separate bowl, whisk together the flour, baking soda, and salt.
- Gradually add the dry ingredients to the wet ingredients, mixing until just combined. Don’t overmix! Overmixing leads to tough bread.
- Fold in the chopped walnuts or pecans (if using).
- Pour the batter into the prepared loaf pan and spread evenly.
- Bake for 50-60 minutes, or until a toothpick inserted into the center comes out clean. In my kitchen, this Maple Banana Bread takes exactly 55 minutes. Pro tip for Maple Banana Bread perfection: tent the loaf with foil during the last 15 minutes of baking to prevent the top from browning too much.
- Let the bread cool in the pan for 10 minutes before transferring it to a wire rack to cool completely.
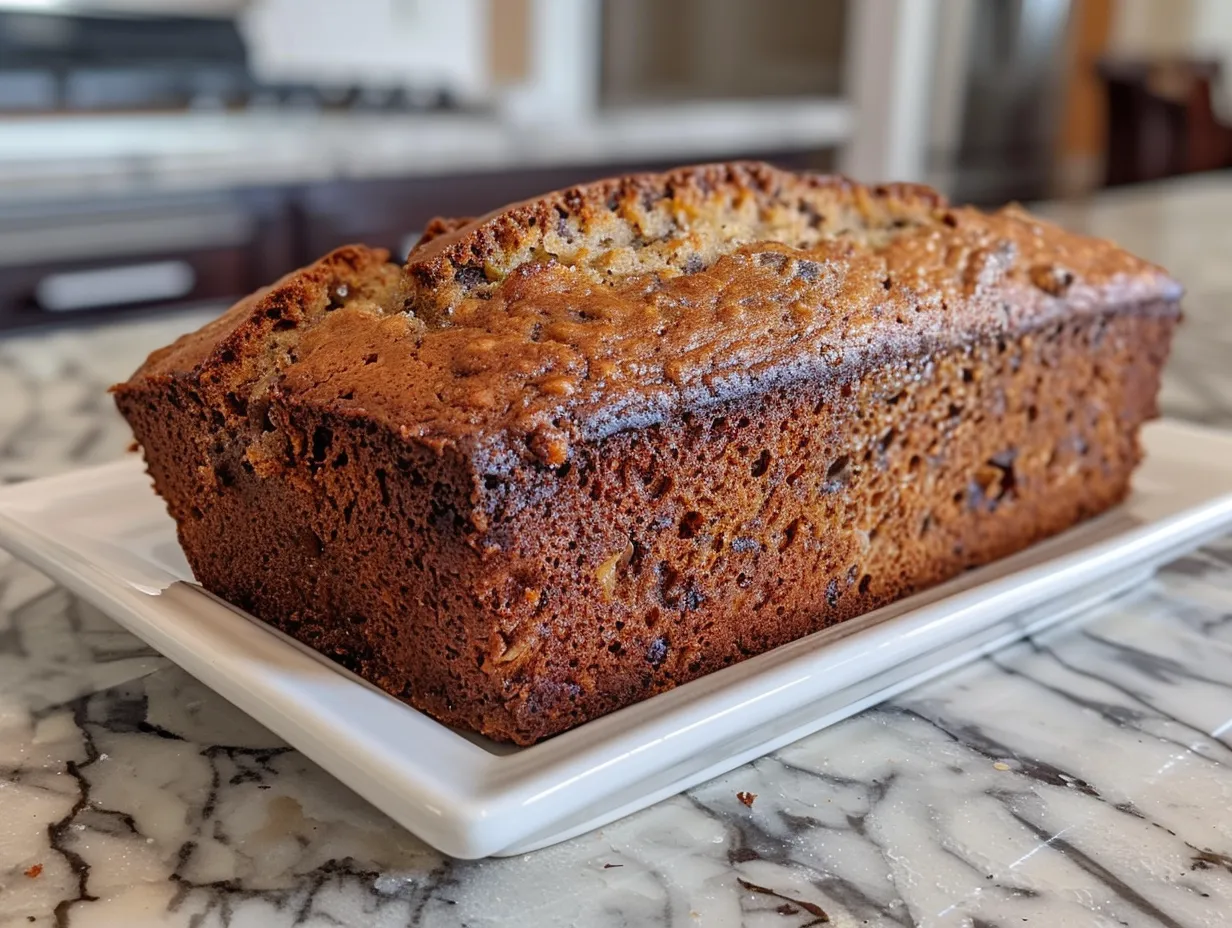
While your **Maple Banana Bread** is working its magic in the oven, grab a glass of milk (or a scoop of ice cream…no judgment here!). The aroma alone is enough to make you drool. Here’s where most people mess up their Maple Banana Bread – they don’t let it cool completely before slicing. Patience, my friends! It’s worth the wait. Your Maple Banana Bread should smell like a sweet, nutty dream and have a beautiful golden-brown crust.
PRESENTATION:
Okay, flavor adventurers, your Maple Banana Bread is baked, cooled, and ready to be devoured. But let’s not forget about presentation! Because even the most delicious food deserves to look its best.
Slice the Maple Banana Bread into thick, generous slices. Stack a few slices on a plate, drizzle with a little extra maple syrup, and sprinkle with a few chopped nuts. People absolutely lose their minds when I serve this Maple Banana Bread at brunch!
For an extra touch of elegance, dust the slices with powdered sugar or top with a dollop of whipped cream. Pair this Maple Banana Bread with a strong cup of coffee or a glass of cold milk. It’s the perfect combination of sweet and satisfying.
This Maple Banana Bread absolutely slays at dinner parties! For more bold flavor adventures, check out these homemade olive garden breadsticks.
If you have any leftover Maple Banana Bread (which is highly unlikely!), you can transform it into French toast or bread pudding. Or, simply wrap it tightly and store it at room temperature for a few days.
FAQs:
Got questions about this Maple Banana Bread? Don’t worry, I’ve got answers! I’ve tested this recipe countless times, so I know all the ins and outs.
Q: Can I make this vegan?
A: Absolutely! Just replace the egg with a flax egg (1 tablespoon of ground flaxseed mixed with 3 tablespoons of water). I’ve tested it both ways, and it works like a charm. For more tasty Vegan recipes check out this Easy Vegan Banana Bread – May I Have That Recipe?
Q: What if I don’t have coconut oil?
A: You can substitute with any other neutral oil, like vegetable oil or canola oil. But trust me, the coconut oil adds a subtle flavor that’s totally worth it.
Q: Can I add chocolate chips?
A: Are you kidding me? OF COURSE! Chocolate chips are always a good idea.
Q: How do I know when my Maple Banana Bread is perfectly done?
A: The toothpick test is your best friend. Insert a toothpick into the center of the loaf. If it comes out clean, it’s done. If it comes out with batter on it, bake for a few more minutes.
Q: Can I freeze this Maple Banana Bread?
A: Yes! Wrap it tightly in plastic wrap and then in foil. It will keep in the freezer for up to 3 months.
Q: Can I reduce the amount of Maple Syrup?
A: I do not reccomend it, if you’re looking for a healthier option then consider trying this Vegan Maple Banana Bread – Rainbow Nourishments.
Q: Can I add a Maple Glaze?
A: You sure can! Try checking out this Maple Glazed Banana Bread – A Latte Food.
Q: Can I make this spicier?
A: Yes! Add a pinch of cinnamon or nutmeg to the batter for a warm, spicy kick. You can even add a pinch of cayenne pepper for a subtle heat.
CONCLUSION:
This Maple Banana Bread isn’t just a recipe; it’s a flavor adventure. It represents everything Cuba Queen stands for: bold, delicious, and unapologetically fun. It’s the perfect way to turn those overripe bananas into something truly special. This **delicious Maple Banana Bread** reminds me of another flavor explosion, maple-roasted carrots with chickpeas.
My Maple Banana Bread Power Tips:
- Use super ripe bananas: They’re the key to sweetness and moisture.
- Don’t overmix the batter: Overmixing leads to tough bread.
- Let it cool completely before slicing: Patience is a virtue!
I’ve created a few variations of this Maple Banana Bread, and they’re all amazing. My personal favorite is the maple glazed banana bread, which gets the biggest reactions every time. Then there’s the healthy maple banana bread, which uses whole wheat flour and less sugar. And let’s not forget the vegan maple banana bread, which is just as delicious as the original. I also experimented with adding brown sugar but it didn’t quite deliver the same impact as the maple.
I’m confident that you can make this Maple Banana Bread your own signature dish. Don’t be afraid to experiment with different flavors and ingredients. Get creative and have fun! If this recipe rocks your world, you NEED to try these mini banana pudding cheesecakes.
Now go forth and create some Maple Banana Bread memories! And don’t forget to share your results with me. I can’t wait to see your creations! Now go make the best Maple Banana Bread you can!
Maple Banana Bread
This Maple Banana Bread is incredibly moist and flavorful, featuring the warm sweetness of maple syrup complementing the ripe bananas. It’s perfect for breakfast, a snack, or even a simple dessert!
- Prep Time: 15 minutes
- Cook Time: 55 minutes
- Total Time: 70 minutes
- Yield: 10 servings
- Category: Breakfast
- Method: Baked
- Cuisine: American
Ingredients
- 1 ½ cups all-purpose flour
- 1 teaspoon baking soda
- ½ teaspoon salt
- ½ cup (1 stick) unsalted butter, softened
- ¾ cup maple syrup
- 2 large eggs
- 1 teaspoon vanilla extract
- 1 cup mashed ripe bananas (about 2-3 medium)
- ½ cup chopped walnuts or pecans (optional)
Instructions
- Preheat oven to 350°F (175°C). Grease and flour a 9×5 inch loaf pan.
- In a medium bowl, whisk together the flour, baking soda, and salt.
- In a large bowl, cream together the softened butter and maple syrup until light and fluffy.
- Beat in the eggs one at a time, then stir in the vanilla extract.
- Gently fold in the mashed bananas until just combined.
- Gradually add the dry ingredients to the wet ingredients, mixing until just combined. Do not overmix.
- If desired, fold in the chopped walnuts or pecans.
- Pour the batter into the prepared loaf pan and spread evenly.
- Bake for 50-60 minutes, or until a wooden skewer inserted into the center comes out clean.
- Let the bread cool in the pan for 10 minutes before transferring it to a wire rack to cool completely.
Notes
For an extra touch, drizzle some maple syrup on top of each slice before serving.