
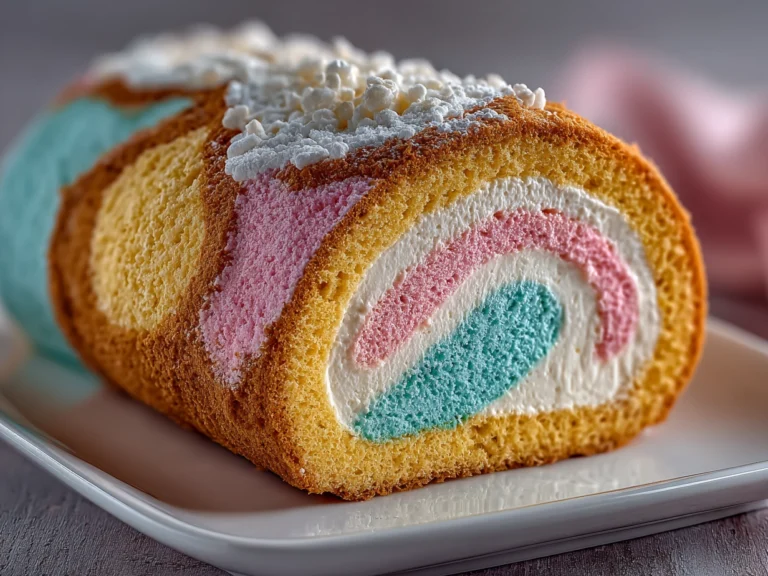
I’ve got to spill the tea on my latest obsession—this Cotton Candy Swiss Cake Roll is a total game-changer. The moment I bit into that colorful cake roll, I knew something special was happening. Picture this: a cloud-soft rolled sponge cake dyed in whimsical pastels, hugging a luscious cream filling infused with the playful cotton candy flavor dessert that instantly brings out your inner kid’s wide-eyed wonder. It’s like a carnival for your taste buds but way classier and way more satisfying.
This Cotton Candy Swiss Cake Roll isn’t just about looks—it’s a bold flavor adventure that captures Cuba Queen’s fearless approach to baking. The first batch I made was a bit of a flop (hello, cracked sponge and rushed rolling), but once I nailed that perfect fluffy texture and got the cotton candy flavor balance just right, everything clicked. I could see it in my tasters’ eyes—they couldn’t stop smiling. This cream-filled cake roll is my new go-to for any celebration needing a colorful cake roll with a wow factor.
Trust me, this isn’t your run-of-the-mill Swiss roll cake. It’s a cotton candy flavor dessert masterpiece wrapped in pastels that’ll have your kitchen smelling dreamy and your guests asking for seconds. I’ve got the recipe and tricks ready to share so you can make this rolled sponge cake steal every show at your next dinner. Let’s turn your baking game on its head with this Cotton Candy Swiss Cake Roll—you’re about to make magic happen.
Ingredients
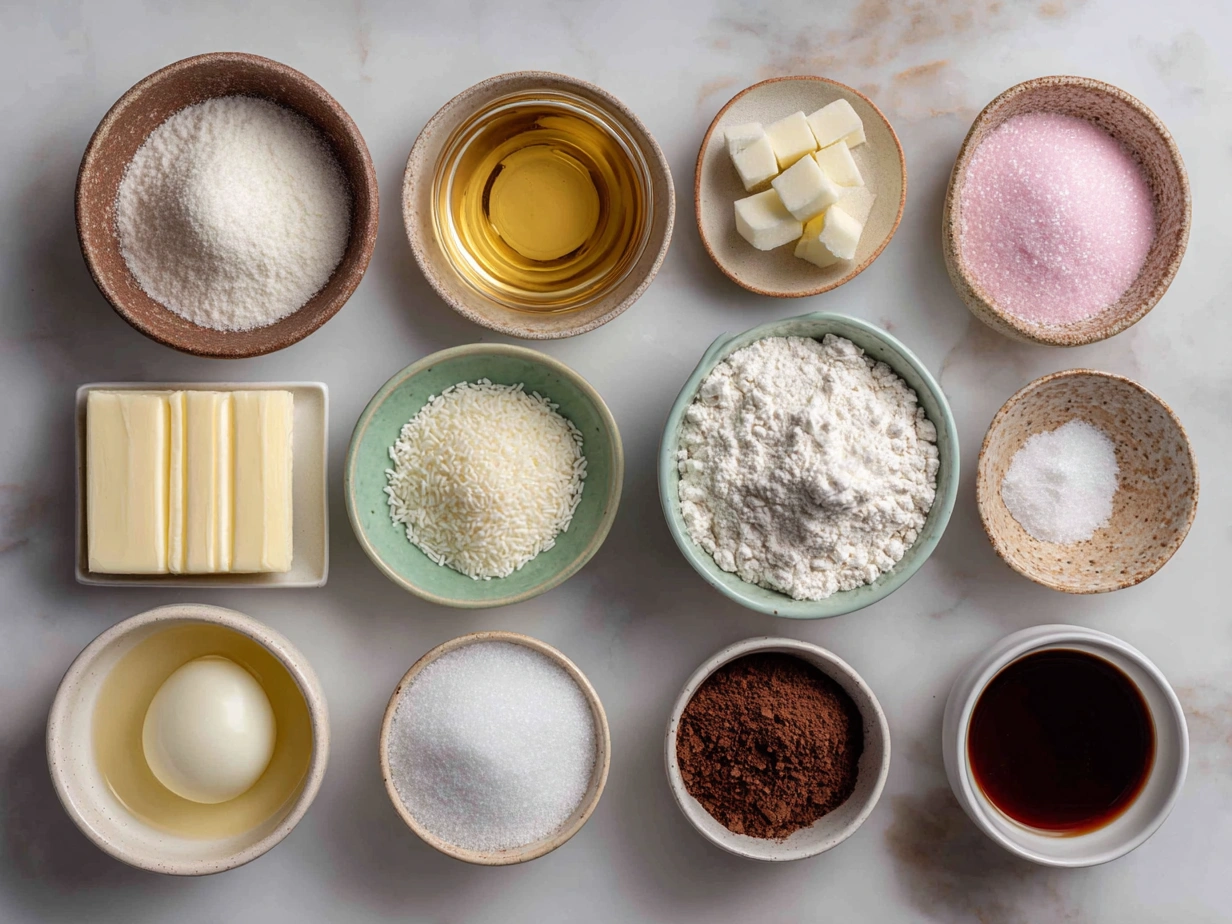
- 4 large eggs, separated
- 3/4 cup granulated sugar
- 1/2 cup all-purpose flour
- 1/4 cup cornstarch
- 1/2 tsp baking powder
- 1/4 tsp salt
- 1 tsp vanilla extract
- Pink and blue food coloring
- 1 cup heavy cream
- 1/2 cup powdered sugar
- 1 tsp cotton candy flavoring
Instructions
Step 1: Prepare the Sponge Cake
Preheat the oven to 350°F (175°C). Line a 10×15-inch jelly roll pan with parchment paper and lightly grease it. In a large bowl, beat egg yolks with half of the sugar until pale and fluffy. In another bowl, sift together flour, cornstarch, baking powder, and salt.
Step 2: Beat Egg Whites
In a separate bowl, beat the egg whites until soft peaks form. Gradually add the remaining sugar and beat until stiff peaks form. Gently fold the dry ingredients into the yolk mixture, then carefully fold in the egg whites to keep the batter light and airy.
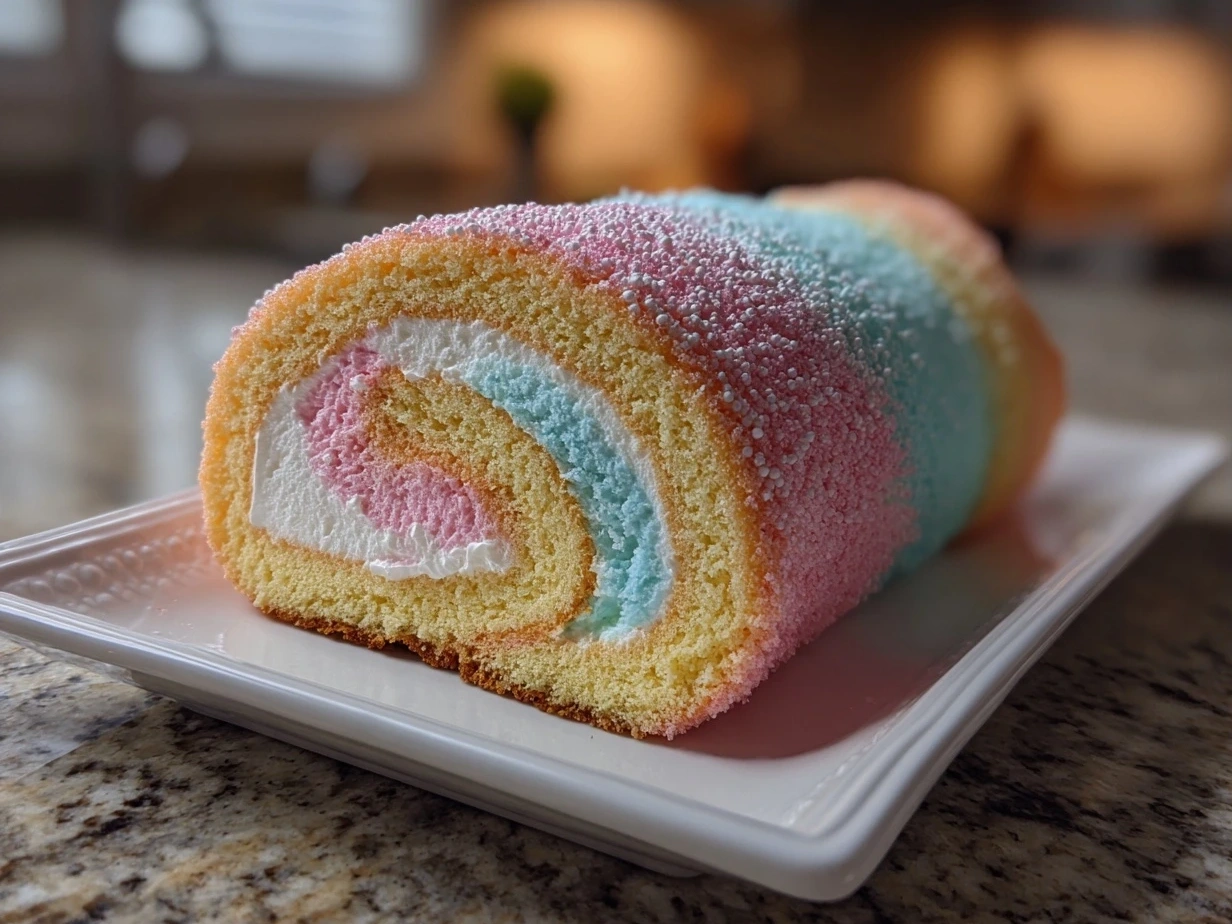
Step 3: Add Color and Bake
Divide the batter into two bowls. Tint each with pink and blue food coloring. Pour the batters swirled together into the pan for a pastel effect. Bake for 12-15 minutes or until a toothpick comes out clean.
Step 4: Roll the Cake
While warm, invert the cake onto a clean kitchen towel dusted with powdered sugar. Carefully peel off parchment paper and roll the cake up in the towel. Let it cool completely.
Step 5: Prepare the Filling
Whip the heavy cream with powdered sugar and cotton candy flavoring until stiff peaks form.
Step 6: Assemble
Unroll the cooled cake and spread the cream filling evenly. Re-roll gently and refrigerate for at least an hour before slicing.
Pro Tip: To avoid cracks, don’t rush rolling the warm sponge—take it slow and steady.
More Rolled Sponge Cake Inspiration
If this flavor explosion has got you hooked, you NEED to try some other rolled sponge cake wonders like the Raspberry White Chocolate Cake Roll or the Pumpkin Cannoli Cake Roll—trust me, these sweets pack that Cuba Queen bold punch every time. For a little quirky inspiration, check out the beautiful techniques shown in the Fancy Pattern Cake Roll Without the Cracks.
For a delicious cotton candy roll experience that’s inspired by Japan’s soft and fluffy variations, check out this Japanese Cotton Candy Swiss Cake Roll. And if you love creative cake shapes and designs, the excitement of baking can be seen in examples like the caterpillar cake on The Great British Bake Off.
Cotton Candy Swiss Cake Roll

This whimsical Cotton Candy Swiss Cake Roll features a light, fluffy sponge cake rolled with sweet cotton candy-flavored cream for a dreamy dessert experience.
- Prep Time: 20 minutes
- Cook Time: 15 minutes
- Total Time: 1 hour 35 minutes
- Yield: 8 servings
- Category: Dessert
- Method: Baked
- Cuisine: American
Ingredients
- 4 large eggs
- 3/4 cup granulated sugar
- 1/2 cup all-purpose flour
- 1/4 cup cornstarch
- 1 tsp baking powder
- 1/4 tsp salt
- 1 tsp vanilla extract
- 1/2 cup heavy whipping cream
- 1/4 cup powdered sugar
- 1 tsp cotton candy flavored syrup or extract
- Pink food coloring (optional)
- Powdered sugar for dusting
Instructions
- Preheat oven to 350°F (175°C). Line a 10×15-inch jelly roll pan with parchment paper and lightly grease it.
- In a large bowl, beat eggs and granulated sugar until thick and pale, about 5 minutes.
- In a separate bowl, sift together flour, cornstarch, baking powder, and salt.
- Gently fold dry ingredients into egg mixture until just combined.
- Add vanilla extract and a few drops of pink food coloring if desired; mix gently to combine.
- Pour batter evenly into prepared pan and spread smooth.
- Bake for 12-15 minutes or until the cake springs back when lightly touched.
- While warm, invert cake onto a clean kitchen towel dusted with powdered sugar; carefully peel off parchment paper.
- Roll cake up tightly with the towel from short end; let cool completely.
- In a chilled bowl, whip heavy cream, powdered sugar, and cotton candy syrup until stiff peaks form.
- Unroll cooled cake and spread the cotton candy cream evenly over the surface.
- Roll the cake back up without the towel, wrap in plastic wrap, and refrigerate for at least 1 hour.
- Before serving, dust the roll with powdered sugar and slice into servings.
Notes
For extra fun, garnish slices with small cotton candy tufts or a drizzle of colored glaze to enhance the whimsical look.