I still remember the exact moment I fell hard for Reeses Peanut Butter Cups. I was at this bustling little carnival, the air buzzing with laughter and the scent of sweet treats. My hand brushed past dozens of candy stands before landing on that iconic orange and yellow wrapper. What caught me by surprise? That intense hit of creamy peanut butter wrapped in smooth, melty chocolate — a combo that punched way above its weight in flavor. It was bold, unapologetic, and instantly unforgettable. That’s exactly the kind of flavor adventure I chase at Cuba Queen.
Reeses Peanut Butter Cups are the ultimate peanut butter chocolate treat. Each bite is a small explosion of richness and satisfaction that lifts spirits and fuels my bold flavor philosophy. These cups aren’t just candy; they’re a powerhouse of intense taste and texture that turns any moment into a celebration-worthy experience.
My obsession with these chocolate peanut butter candies led me down a delicious rabbit hole, testing homemade versions, tweaking Reese’s cups ingredients, and perfecting the balance of salty and sweet. Nothing screams flavor as loud and proud as Reeses. Even beyond the classic snack, I’ve discovered monster upgrades and twists that take peanut butter cup recipes to the next level. I’m so excited to share this with you — ready to bring that bold Reeses Peanut Butter Cups magic into your kitchen and surprise your taste buds? Let’s go all in and make every bite count.
Ingredients You Need for This:
This Reeses Peanut Butter Cups ingredient list is SHORT but mighty!
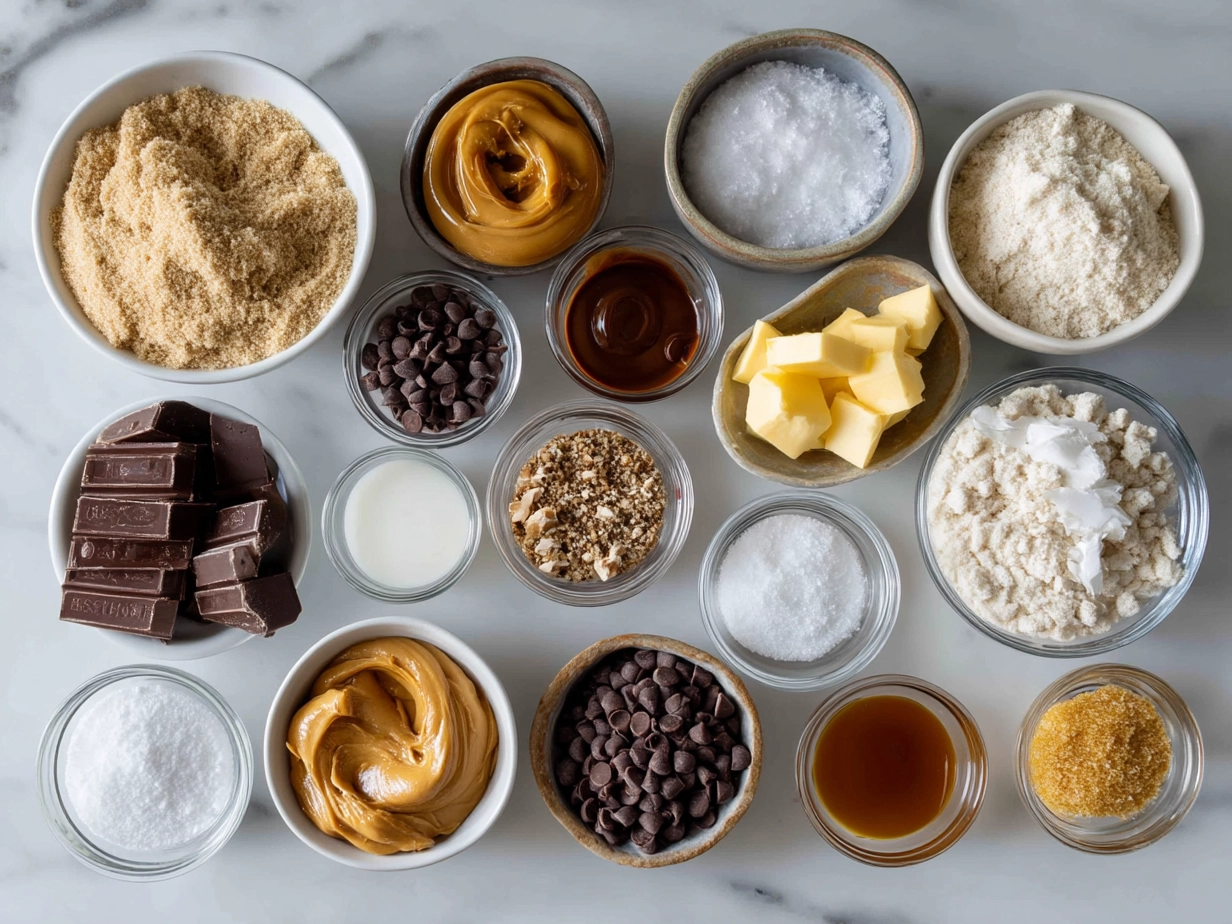
- 1 cup creamy peanut butter – Not just any peanut butter. Choose natural peanut butter with no extra sugar or oil for that pure, nutty punch. Splurge on fresh peanut butter from your local market or Justin’s dark chocolate peanut butter cups for inspiration.
- 1/4 cup unsalted butter – This adds richness to the peanut butter chocolate treat, cutting any dryness and giving that melt-in-your-mouth texture.
- 1/2 cup powdered sugar – Key to that sweet edge without overpowering the peanut butter.
- 1 teaspoon vanilla extract – It amps up depth, rounding out flavors beautifully.
- 12 oz milk chocolate chips – Quality matters here. Look for premium chocolate chips or even the classic REESE’S Milk Chocolate Peanut Butter Cups for flavor inspiration.
- 1 tablespoon vegetable oil – This keeps the chocolate silky and smooth when melted.
Pro tip: The secret to epic Reeses Peanut Butter Cups is using real peanut butter and fresh chocolate chips instead of store-bought peanut butter candy melts. You’ll find the best ingredients for this Reeses Peanut Butter Cups at specialty grocers or online gourmet stores.
Budget-friendly alternative? Use peanut butter powder mixed with a little vegetable oil instead of creamy peanut butter. You’ll still hit that signature peanut butter chocolate treat vibe without stretching the wallet.
For storage, portion out your peanut butter filling ahead of time. Keep it refrigerated in an airtight container for up to a week. It’ll save you steps when you’re ready to assemble your Reeses Peanut Butter Cups.
Step-by-Step Instructions:
Here’s where most people mess up their Reeses Peanut Butter Cups – but not you!
- Melt the chocolate chips: In a microwave-safe bowl, melt your milk chocolate chips with the vegetable oil in 30-second bursts. Stir in between to prevent burning. Your chocolate should be glossy and silky — if it looks grainy, keep stirring; it’ll smooth out.
- Prepare the peanut butter filling: Mix the peanut butter, unsalted butter, powdered sugar, and vanilla extract in a bowl until smooth and thick. It should hold its shape but still be soft enough to pipe or scoop.
- Start layering: Spoon a tablespoon of melted chocolate into the bottom of each cupcake liner, then pop them in the freezer for 5 minutes. This sets a chocolate base that holds your peanut butter like a champ.
- Add peanut butter: Dollop or pipe a heaping spoonful of your peanut butter filling on top. Don’t stress — your Reeses Peanut Butter Cups are going to be incredible. The filling’s luscious and firm but creamy.
- Top with chocolate: Pour another tablespoon of melted chocolate to cover. Tap gently on the counter to smooth out the tops and seal the filling.
- Chill and set: Freeze your cups for 20–30 minutes until firm. Pro tip for Reeses Peanut Butter Cups perfection: Don’t rush this step! The chill creates that perfect bite, balancing soft peanut butter and dense chocolate.
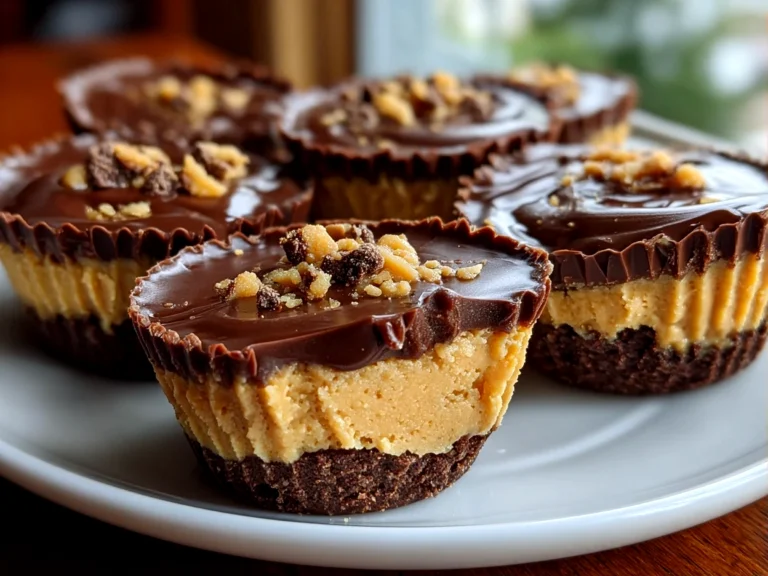
- Enjoy or store: Your Reeses Peanut Butter Cups should look glossy with an even chocolate shell. Smell that peanut butter chocolate treat aroma — pure happiness. Store them in an airtight container in the fridge for up to two weeks.
Efficiency hack? Use a piping bag for the chocolate and peanut butter layers to speed up assembly and keep it mess-free.
While your Reeses Peanut Butter Cups is working its magic, grab your camera — this is Instagram gold!
Presentation:

People absolutely lose their minds when I serve this Reeses Peanut Butter Cups at parties and family gatherings. They’re mini flavor bombs that look as good as they taste.
Display them on a glossy black platter to contrast the deep orange wrappers or remove the paper cups for a naked chocolate peanut butter candy look that screams indulgence.
Pair with a chilled espresso martini or creamy ice-cold milk to amplify the chocolate peanut butter dance on your palate. This Reeses Peanut Butter Cups absolutely slays at dinner parties!
For Instagram-worthy plating, sprinkle a few crushed peanuts or a light dusting of cocoa powder on top just before serving. Add fresh mint leaves for a pop of unexpected color and freshness.
Got leftovers? Reheat them slightly and spread over warm toast like a peanut butter chocolate treat spread. Or mix chopped up Reeses Peanut Butter Cups into brownie batter for a gooey surprise.
Seasonal? You’ve got to try my spicy Reeses Peanut Butter Cup holiday twist with a dash of cayenne or my summertime version with chopped roasted peanuts on top. Both bring wild reactions every single time.
If this recipe rocks your world, you NEED to try my other flavor-packed treats like the Reeses Peanut Butter Cup Earthquake Cake or the genius Reeses Peanut Butter Cup Cookies.
FAQs:
- Can I make this Reeses Peanut Butter Cups spicier?
Absolutely! Add a pinch of cayenne or chili powder to the peanut butter filling, or sprinkle chili flakes on the chocolate before it sets. This adds an unexpected kick that won’t overpower. Flavor adventurers love it. - What if I don’t have vanilla extract?
Swap with almond extract or skip it entirely. The peanut butter and chocolate combo shines bright enough. But a splash of vanilla deepens flavor beautifully. - How do I know when my Reeses Peanut Butter Cups is perfectly done?
Your chocolate shell should be firm but not cracked, and the peanut butter filling should hold its shape, soft and creamy inside. If the chocolate melts too easily at room temp, refrigerate before serving. - Can these be made vegan?
Yes! Use dairy-free chocolate chips and swap butter for coconut oil. Choose a vegan peanut butter without additives. The texture shifts slightly but the flavor fire is still intense. - Can I make these ahead of time?
For sure. Store in an airtight container refrigerated for up to two weeks or freeze for up to 3 months. Thaw in fridge overnight before enjoying. - Why does my chocolate seize when melting?
Full-fat chocolate chips with a little oil fix this. Avoid water near chocolate and stir constantly at low heat. - Any tips for making Reeses Peanut Butter Cups smoother?
Heat your peanut butter filling gently before assembling if too stiff. Also, avoid over-mixing or your chocolate could be grainy.
My community rave about my homemade peanut butter cup recipe. They say it’s the closest thing to original and supercharged with bold flavor.
Conclusion:
This Reeses Peanut Butter Cups recipe is Cuba Queen’s bold flavor manifesto in edible form — a peanut butter chocolate treat that’s simple, satisfying, and unforgettable.
Reeses Peanut Butter Cups Power Tips:
- Freeze your cups after each chocolate layer for razor-sharp edges and clean layers.
- Use fresh, creamy natural peanut butter to avoid waxy textures.
- Don’t skip the splash of vegetable oil in melted chocolate for perfect shine and melt.
Over the years, I’ve whipped up versions from spicy cayenne to dark chocolate swaps inspired by Justin’s Dark Chocolate Peanut Butter Cups, and the classic always wins hearts.
The Reeses Peanut Butter Cup Earthquake Cake gets the loudest compliments (and biggest crumbs) at my gatherings.
Make this Reeses Peanut Butter Cups your signature snack. I know you’ll impress yourself and anyone lucky enough to try them.
I can’t wait to see your flavor adventures and Reeses Peanut Butter Cups creations — tag me and share your triumphs! Let’s keep these bold flavor memories rolling.
If you love punchy flavor combos, check out my no-bake Chocolate Peanut Butter Pie next for even more celebration-worthy treats.
Here’s to big, bold bites with Reeses Peanut Butter Cups — your new kitchen obsession.
Reeses Peanut Butter Cups
Homemade Reeses Peanut Butter Cups combine creamy peanut butter and rich chocolate for a nostalgic and irresistible treat perfect for any sweet craving.
- Prep Time: 10 minutes
- Cook Time: 5 minutes
- Total Time: 1 hour 15 minutes
- Yield: 12 servings
- Category: Dessert
- Method: No-Cook
- Cuisine: American
Ingredients
- 1 cup creamy peanut butter
- 1/4 cup unsalted butter, melted
- 1/4 cup powdered sugar
- 2 cups semi-sweet chocolate chips
- 1 tablespoon vegetable oil
Instructions
- Line a mini muffin tin with paper liners.
- In a bowl, mix peanut butter, melted butter, and powdered sugar until smooth.
- Melt chocolate chips with vegetable oil in a microwave-safe bowl, heating in 30-second intervals and stirring until smooth.
- Place about 1 teaspoon of melted chocolate into each liner, swirling to coat the bottom.
- Add about 1 tablespoon of the peanut butter mixture on top of the chocolate layer, pressing gently.
- Cover peanut butter layer with another teaspoon of melted chocolate.
- Refrigerate for at least 1 hour until firm.
- Remove cups from liners and enjoy.
Notes
For a crunchier texture, sprinkle a pinch of crushed peanuts on top before the final chocolate layer sets.