
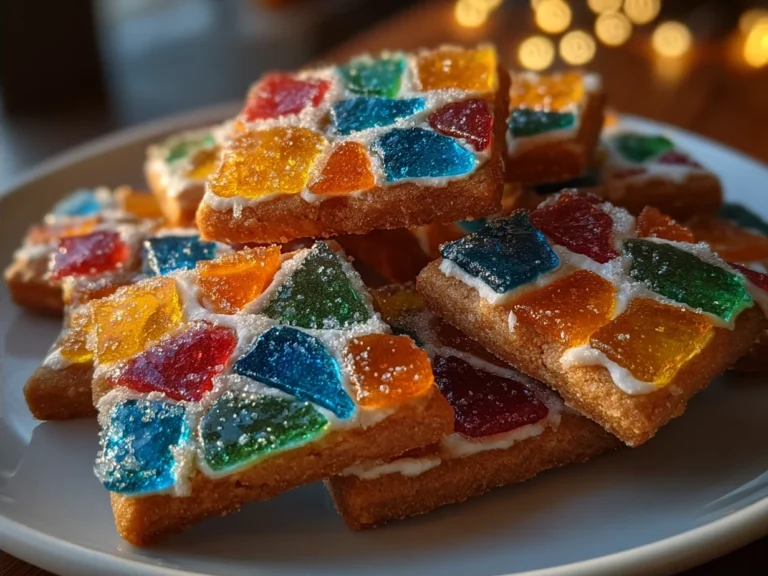
Okay, flavor adventurers, buckle up! I’m about to drop a bomb of sweetness and sparkle into your kitchen: Stained Glass Cookies!
I’m talking about those showstopping cookies that look like they were plucked straight from a fairytale bakery. You know, the ones with the glistening, colorful “glass” in the middle? They’re epic, right?
I first had them at a holiday market, years ago. Honestly? I thought they’d be all looks, no flavor. Boy, was I wrong!
The buttery cookie, combined with the sugary crunch of the hard candy center…it was a revelation! A total flavor adventure. The vibrant colors just made me happy. This Stained Glass Cookies immediately inspired me to make my own!
Of course, my Cuba Queen twist means BIGGER flavor, BOLDER colors, and a whole lot more fun. Forget boring holiday treats – this Stained Glass Cookies recipe is about to become your new obsession.
Let’s turn your kitchen into a sugar-fueled art studio!
INGREDIENTS You Need for This:
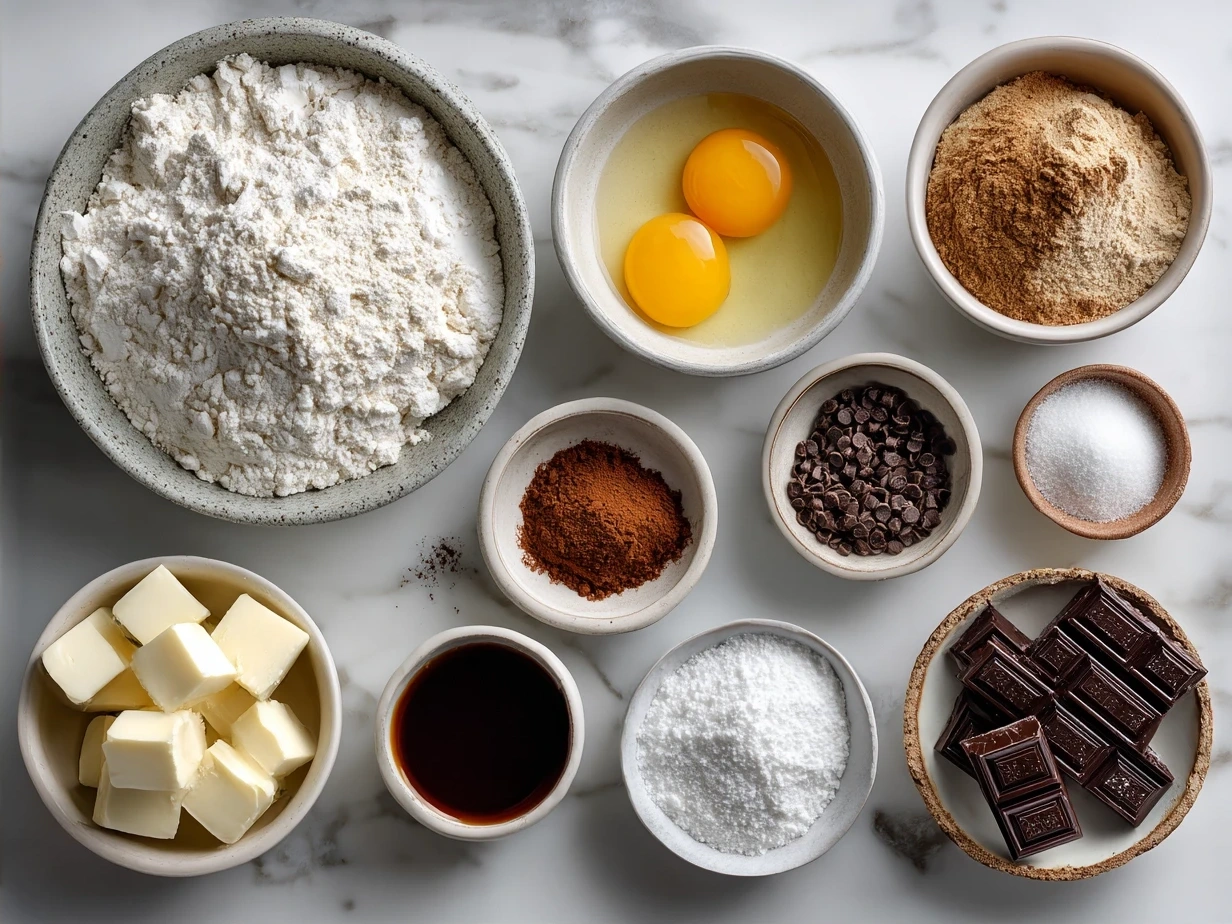
- 1 cup (2 sticks) unsalted butter, softened: Don’t even THINK about using margarine here. Butter is the soul of these Stained Glass Cookies.
- ¾ cup granulated sugar: For that perfect sweetness and cookie crumb.
- ¼ cup packed light brown sugar: Adds a touch of molasses-y warmth.
- 1 large egg: Binds everything together and adds richness.
- 1 teaspoon vanilla extract: A must for that classic cookie flavor.
- 2 ¼ cups all-purpose flour: The base of our beautiful Stained Glass Cookies.
- ½ teaspoon baking powder: Helps create a light and tender texture.
- ¼ teaspoon salt: Balances the sweetness.
- Assorted hard candies: Here’s where the magic happens! Think Jolly Ranchers, Lifesavers, or any hard candy you love. The brighter the colors, the better the Stained Glass Cookies will look.
- Optional Flavor Boosters: Citrus zest, almond extract, a pinch of cinnamon…get creative with your Stained Glass Cookies!
This Stained Glass Cookies ingredient list is SHORT but mighty! The secret to epic Stained Glass Cookies is using GOOD butter. Splurge on the European stuff if you can. You’ll taste the difference! You can get all your ingredients from most grocery stores or online, but for specialty flavors, check out your local candy shop.
For budget-friendly alternatives, generic hard candies work just fine. Don’t be scared to experiment with the flavor of your sugar cookies! For another twist, take a look at these Brown Sugar Cookies.
Store your ingredients properly before starting – softened butter is key!
STEP-BY-STEP INSTRUCTIONS:
- Cream the butter and sugars: In a large bowl, cream together the softened butter, granulated sugar, and brown sugar until light and fluffy. This is where your electric mixer comes in handy! Don’t rush this step; it’s crucial for a tender Stained Glass Cookies.
- Add the egg and vanilla: Beat in the egg and vanilla extract until well combined. We’re building layers of flavor here!
- Combine the dry ingredients: In a separate bowl, whisk together the flour, baking powder, and salt. This ensures everything is evenly distributed.
- Gradually add the dry ingredients to the wet ingredients: Add the dry ingredients to the wet ingredients a little at a time, mixing until just combined. Be careful not to overmix, or your Stained Glass Cookies will be tough.
- Chill the dough: Wrap the dough in plastic wrap and chill in the refrigerator for at least 30 minutes. This helps prevent the Stained Glass Cookies from spreading too much in the oven.
- Preheat and prepare: Preheat your oven to 375°F (190°C). Line baking sheets with parchment paper.
- Roll out the dough: On a lightly floured surface, roll out the dough to about ¼ inch thickness. I like to work in batches to keep the dough cold.
- Cut out shapes: Use cookie cutters to cut out your desired shapes. Remember to cut out a smaller shape in the center of each cookie for the “stained glass” effect. You can use different sized cookie cutters or even a knife for this.
- Crush the hard candies: Place the hard candies in a zip-top bag and crush them into small pieces using a rolling pin or a meat mallet. This is a great way to relieve some stress!
- Fill the centers: Place the cut-out cookies on the prepared baking sheets. Fill the center of each cookie with the crushed hard candies, creating a colorful “stained glass” window.
- Bake: Bake for 8-10 minutes, or until the edges of the cookies are lightly golden brown and the candy is melted and smooth.
- Cool completely: Let the Stained Glass Cookies cool completely on the baking sheets before transferring them to a wire rack. This allows the candy to harden properly. Pro tip for Stained Glass Cookies perfection: Don’t try to move them while they’re still warm!
Here’s where most people mess up their Stained Glass Cookies – they overbake them! Trust me, a little underbaked is better than burnt. Your Stained Glass Cookies should look slightly golden around the edges, and the candy should be fully melted and bubbly. This Stained Glass Cookies recipe is about to become your signature holiday dish!
You can learn more about working with hard candy by researching this Stained glass cookie recipe from the 1970s?.
PRESENTATION:
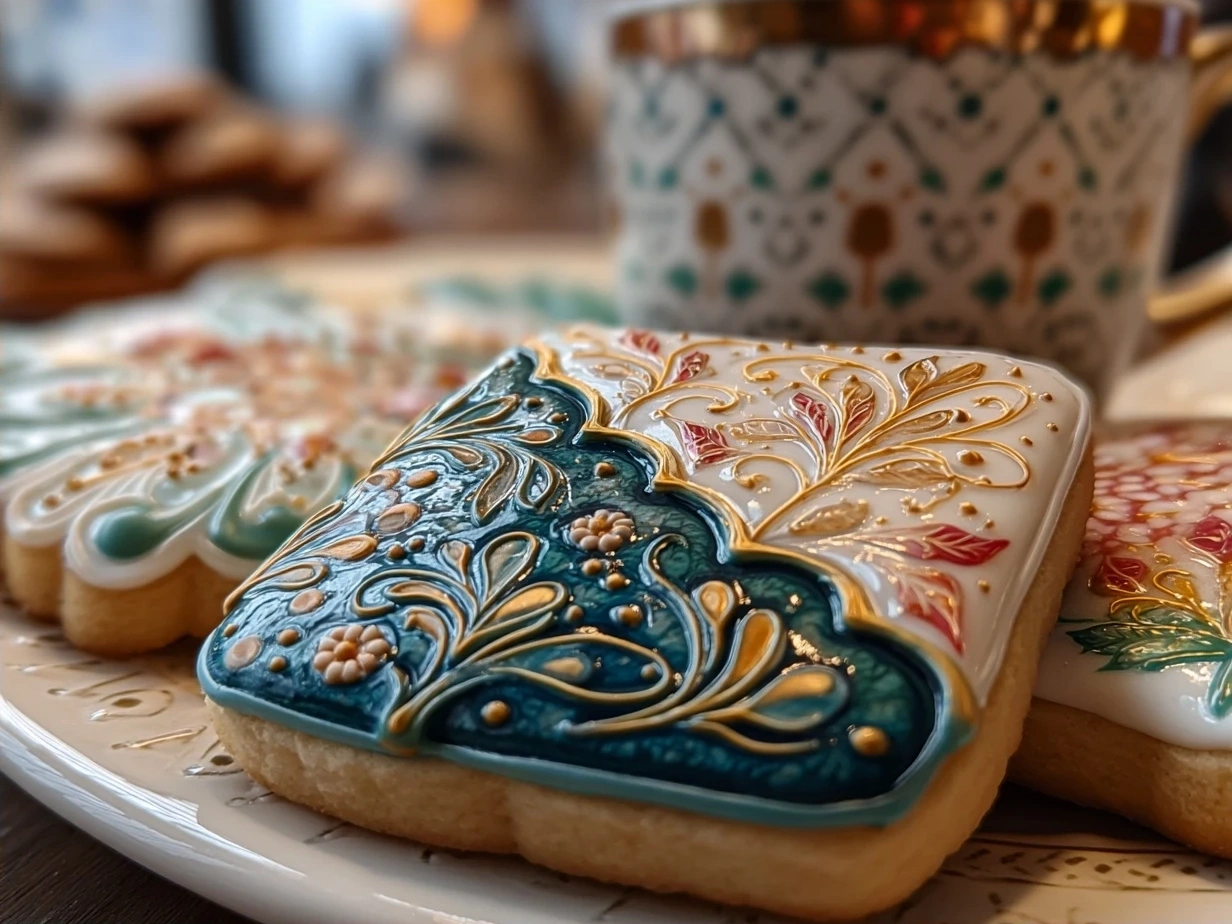
Presentation is EVERYTHING when it comes to Stained Glass Cookies! Think about it – these are practically edible jewels.
For maximum impact, arrange your Stained Glass Cookies on a tiered serving platter. Let those colors POP! Dust them lightly with powdered sugar for a snowy effect, especially around Christmas Cookies time!
People absolutely lose their minds when I serve this Stained Glass Cookies at holiday parties. They’re the first thing to disappear! For a fun twist, try hanging them on your Christmas tree using ribbon. Talk about festive!
These Stained Glass Cookies are also amazing with a cup of hot cocoa. The warmth of the drink melts the candy just a little, making it even more gooey and delicious. People absolutely lose their minds when I serve this Stained Glass Cookies at holiday parties!
If you have leftover Stained Glass Cookies (which is rare!), you can crush them up and sprinkle them over ice cream. Or, use them to decorate a cake!
For more holiday inspiration, check out Snowflake Filled Snowman Cookies | Hungry Happenings!
FAQs:
- Can I use different types of candy for the stained glass effect? Absolutely! Get creative with your candy choices. Just make sure they are hard candies that melt well. Clear candies will create a more transparent “glass” effect.
- What if I don’t have cookie cutters? No problem! You can use a knife to cut out squares, triangles, or any other shape you like. The most important thing is to have a smaller shape cut out in the center.
- How do I prevent the cookies from spreading too much? Chilling the dough is key. Also, make sure your oven is at the correct temperature. If your Stained Glass Cookies still spread, try adding a little more flour to the dough next time.
- Can I make the dough ahead of time? Yes! The dough can be made up to 2 days in advance and stored in the refrigerator. Just let it soften slightly before rolling it out.
- How do I store the Stained Glass Cookies? Store the Stained Glass Cookies in an airtight container at room temperature. They will stay fresh for about a week.
- Can I use isomalt instead of hard candies? While I prefer the classic hard candy method for ease and flavor, isomalt is an option for edible glass. Just be careful, it gets HOT! You can read more about it on this forum thread: Can I use isomalt with color for stained glass cookies?
- Can I make this Stained Glass Cookies spicier? I LOVE that you asked! Add a pinch of cayenne pepper to the dough for a subtle kick. Or, use cinnamon-flavored hard candies for the center.
I’ve spent HOURS perfecting this Stained Glass Cookies recipe, tweaking the flavors, and testing different techniques. The community feedback has been incredible! People are loving the bold colors and the satisfying crunch. Don’t be intimidated – you got this!
CONCLUSION:
These Stained Glass Cookies represent everything Cuba Queen stands for: bold flavor, creative expression, and a whole lot of fun!
My Stained Glass Cookies Power Tips:
- Use good quality butter: It makes ALL the difference.
- Don’t overbake: A little underbaked is better than burnt.
- Get creative with your candy: Experiment with different colors and flavors.
I’ve created so many variations of these Stained Glass Cookies, each one more delicious than the last. I love adding citrus zest to the dough for a bright, zesty flavor. Another favorite is using peppermint candies for a festive holiday treat. These would pair really well with Oatmeal Raisin Cookies.
The version that gets the biggest reactions? The one with edible glitter sprinkled on top! Talk about a showstopper. For even MORE holiday inspiration, check out these Double Chocolate Vegan Black Bean Cookies for another bold treat.
I am confident that you will create amazing Stained Glass Cookies. Make this your signature dish, share them with your loved ones, and create some sweet memories!
Now go forth, flavor adventurers, and create some Stained Glass Cookies magic! Don’t forget to share your results with me – I can’t wait to see your creations!
\n \n Print
Stained Glass Cookies

These whimsical Stained Glass Cookies are as beautiful as they are delicious! Made with simple ingredients and melted hard candies, they’re perfect for the holidays or any special occasion.
- Prep Time: 30 minutes
- Cook Time: 8 minutes
- Total Time: 38 minutes
- Yield: Approximately 24 cookies
- Category: Dessert
- Method: Baked
- Cuisine: American
Ingredients
- 1 cup (2 sticks) unsalted butter, softened
- 1 cup granulated sugar
- 2 large eggs
- 1 teaspoon vanilla extract
- 3 cups all-purpose flour
- 1 teaspoon baking powder
- 1/2 teaspoon salt
- Assorted hard candies, crushed into small pieces
Instructions
- Preheat oven to 375°F (190°C). Line baking sheets with parchment paper.
- In a large bowl, cream together the butter and sugar until light and fluffy. Beat in the eggs one at a time, then stir in the vanilla.
- In a separate bowl, whisk together the flour, baking powder, and salt. Gradually add the dry ingredients to the wet ingredients, mixing until just combined.
- Divide the dough in half. On a lightly floured surface, roll out one half of the dough to about 1/4 inch thickness. Use cookie cutters to cut out desired shapes. Use a smaller cutter to cut out a shape within each cookie to create the “stained glass” window.
- Place the cookies on the prepared baking sheets. Fill the empty spaces with crushed hard candies.
- Bake for 6-8 minutes, or until the edges of the cookies are lightly golden and the candies are melted.
- Let the cookies cool completely on the baking sheets before removing.
Notes
For even more vibrant colors, sort the hard candies by color before crushing them. You can also use different flavored hard candies for a unique twist.