
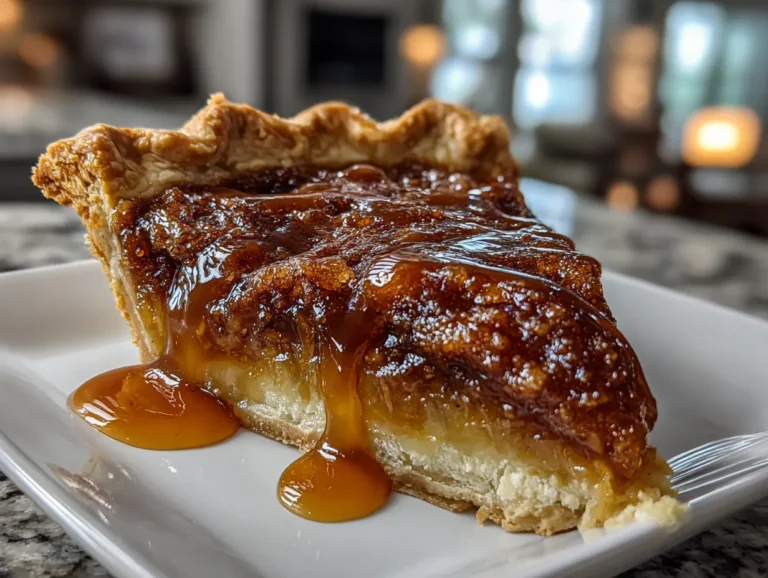
Forget everything you think you know about apple pie, because I’m about to blow your mind! Get ready for my Apple Butter Pie – a flavor explosion so intense, it’ll make you question all your dessert loyalties. This ain’t your grandma’s pie (unless your grandma’s got a secret stash of Cuban spices, that is!). It’s a bold, beautiful, and utterly addictive twist on a classic.
I knew I had to create this Apple Butter Pie the second I tasted homemade apple butter at a local fall festival. The rich, spiced apple flavor, swirled with that creamy texture, screamed “PIE FILLING!” It was an immediate obsession.
The first few attempts were… not great. Too sweet, too bland, too much like every other Apple Pie out there. But I’m not one to back down from a flavor challenge. I kept tweaking, adding layers of spices, experimenting with different crusts, until BAM! The Apple Butter Pie of my dreams was born.
This Apple Butter Pie represents everything Cuba Queen stands for: bold flavors, unapologetic indulgence, and a touch of unexpected magic. It’s the kind of dessert that makes you close your eyes and savor every single bite. Trust me, this Apple Butter Pie is a flavor adventure you don’t want to miss.
I am SO ready to share my Apple Butter Pie recipe with you. Prepare to become a pie-baking rockstar! This Apple Butter Pie will definitely impress even your toughest food critic. You’ll be making this Apple Dessert every fall.
INGREDIENTS You Need for This:
- 1 box (14.1 ounces) refrigerated pie crusts: Store-bought is totally fine for this Apple Butter Pie – no judgment here! But if you’re feeling ambitious, go for homemade.
- 1 cup apple butter: This is the star! The secret to an epic Apple Butter Pie is finding the BEST quality apple butter. The apple butter pie recipe with heavy cream and spices recipe is similar to this one.
- ½ cup heavy cream: Adds richness and helps create that smooth, dreamy texture.
- 2 large eggs: They bind everything together and give the filling a beautiful custardy consistency.
- ¼ cup packed light brown sugar: Brown sugar adds a molasses-y depth that complements the apple butter perfectly.
- 2 tablespoons all-purpose flour: Helps thicken the filling.
- 1 teaspoon ground cinnamon: Because what’s Apple Pie without cinnamon?
- ½ teaspoon ground nutmeg: Adds warmth and spice.
- ¼ teaspoon ground cloves: A little goes a long way, but it adds a complex layer of flavor.
- ¼ teaspoon salt: Balances the sweetness and enhances all the other flavors.
- 2 tablespoons unsalted butter, melted: Brush this over the crust before baking for a golden-brown finish.
- Optional: Turbinado sugar for sprinkling: Adds a sparkly, crunchy topping.
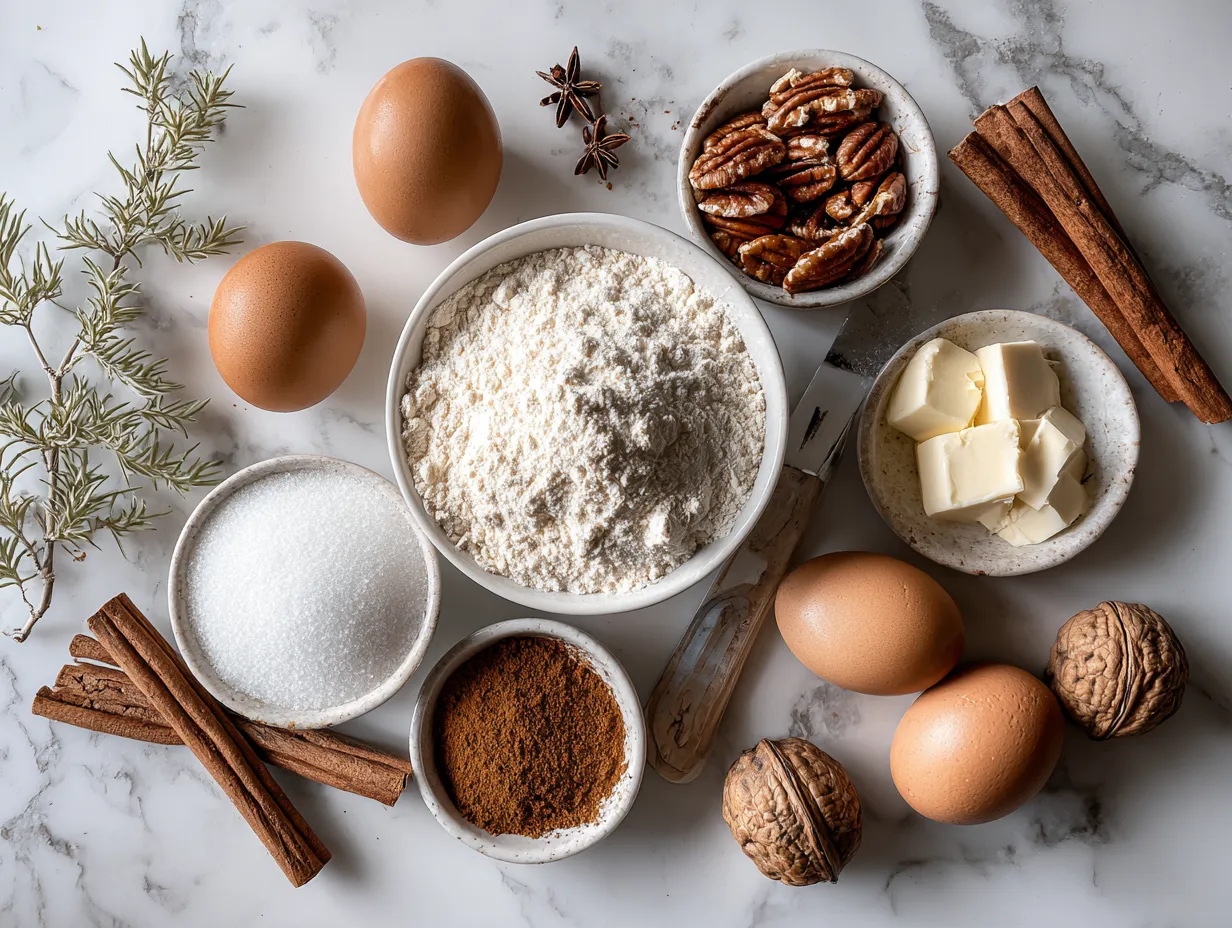
This Apple Butter Pie ingredient list is SHORT but mighty! You can typically find apple butter at farmers markets or specialty grocery stores. Here’s the Apple Butter Pie game-changer that will blow your mind: use spiced apple butter for an even bolder flavor!
Splurge on high-quality spices – it makes a HUGE difference in the overall flavor of this Homemade Pie. Make sure your baking powder is fresh too!
STEP-BY-STEP INSTRUCTIONS:
- Preheat your oven to 375°F (190°C). While it’s heating up, gently unroll one of the pie crusts and place it in a 9-inch pie plate. Crimp the edges to make them pretty. You can find great inspiration for Fall Baking projects here.
- In a large bowl, whisk together the apple butter, heavy cream, eggs, brown sugar, flour, cinnamon, nutmeg, cloves, and salt until smooth. This is where your Apple Butter Pie transforms into pure magic.
- Pour the apple butter mixture into the prepared pie crust. Don’t stress – your Apple Butter Pie is going to be incredible.
- Unroll the second pie crust and cut into strips. Arrange the strips in a lattice pattern over the filling. Alternatively, you can use cookie cutters to create fun shapes and arrange them on top. This step gives a classic Apple Pie look.
- Brush the melted butter over the crust and lattice strips. This will help them brown beautifully and add a touch of richness. Sprinkle with turbinado sugar, if desired, for extra sparkle and crunch.
- Bake for 45-55 minutes, or until the crust is golden brown and the filling is set. Pro tip for Apple Butter Pie perfection: if the crust starts to brown too quickly, tent the pie with foil.
- Let the Apple Butter Pie cool completely on a wire rack before slicing and serving. This is crucial for the filling to set properly. The Apple Butter Pie should look golden brown and smell heavenly.
- While your Apple Butter Pie is working its magic, grab your camera – this is Instagram gold! Your kitchen should smell like the most delicious Cinnamon Apple Pie dream. In my kitchen, this Apple Butter Pie takes exactly 50 minutes to bake to perfection.
Here’s where most people mess up their Apple Butter Pie – they don’t let it cool completely! Be patient, flavor adventurers! For more bold flavor adventures, check out this Butternut Squash Soup recipe!
PRESENTATION:
This Apple Butter Pie deserves a presentation as bold as its flavor! Serve it warm or at room temperature, topped with a scoop of vanilla ice cream or a dollop of whipped cream. People absolutely lose their minds when I serve this Apple Butter Pie variations at Thanksgiving.
For an extra touch of elegance, dust the plate with powdered sugar or cocoa powder before placing the slice. A sprig of fresh mint adds a pop of color and freshness. This Apple Butter Pie absolutely slays at dinner parties!
Pair this Apple Butter Pie with a glass of chilled caramel apple sangria for the ultimate fall indulgence. You can find my caramel apple sangria recipe here.
Leftover Apple Butter Pie can be transformed into a decadent trifle. Simply crumble the pie crust, layer it with whipped cream, apple butter, and chopped pecans in a glass bowl. The perfect occasion for this Apple Butter Pie is any fall gathering or holiday celebration! It’s also amazing for a cozy night in.
I’ve even made mini Apple Butter Pies in muffin tins for individual servings. Talk about adorable! I’ve tested a seasonal Apple Butter Pie variation with cranberries and orange zest. The tartness balances the sweetness perfectly.
FAQs:
- Can I make this Apple Butter Pie spicier?Absolutely! Add a pinch of cayenne pepper to the filling for a subtle kick. You can also use a spiced apple butter for an extra layer of warmth. I have a version of this Apple Butter Pie with a cinnamon oat topping that is fantastic.
- What if I don’t have heavy cream for my Apple Butter Pie?You can substitute it with half-and-half or whole milk, but the filling won’t be as rich and creamy. I always test my Apple Butter Pie variations with both to be sure.
- How do I know when my Apple Butter Pie is perfectly done?The crust should be golden brown and the filling should be set around the edges, with just a slight jiggle in the center. It will continue to set as it cools. Don’t overbake, or the filling will be dry.
- Can I make this Apple Butter Pie ahead of time?Yes! This Apple Butter Pie is actually better the next day, as the flavors have time to meld together. Store it in the refrigerator, covered, for up to 3 days.
- What’s the best way to reheat Apple Butter Pie?You can reheat individual slices in the microwave for a few seconds, or warm the whole pie in a low oven (300°F/150°C) for about 15 minutes. I always get feedback from my community when perfecting recipes.
- Can I freeze this Apple Butter Pie?Yes, you can freeze baked Apple Butter Pie for up to 2 months. Wrap it tightly in plastic wrap and then foil. Thaw in the refrigerator overnight before serving. Community feedback is crucial!
- Is there a way to incorporate caramel into this recipe?You can add a layer of caramel sauce to the bottom of the crust before pouring in the apple butter filling. Or, drizzle caramel sauce over the top of the baked pie before serving. Just imagine the deliciousness of combining two amazing treats like a Cinnamon Apple Pie and Caramel!
CONCLUSION:
This Apple Butter Pie is more than just a dessert; it’s an experience. It’s the taste of fall in every bite, a celebration of bold flavors, and a testament to the magic that happens when you dare to be different. It represents the heart and soul of Cuba Queen, where every recipe is an invitation to create a culinary adventure.
My Apple Butter Pie Power Tips:
- Use high-quality apple butter for the best flavor.
- Don’t overbake the pie, or the filling will be dry.
- Let the pie cool completely before slicing and serving.
I’ve created and loved several Apple Butter Pie variations, including a salted caramel version, a bourbon-spiked version, and a version with a gingersnap crust. All versions receive huge reactions.
I have no doubt that you, flavor adventurers, will create some incredible Apple Butter Pie memories. This Apple Butter Pie recipe reminds me of another flavor explosion: the Apple Pie Cinnamon Roll Casserole RECIPE.
Make this Apple Butter Pie your signature dish! I’m confident that you’ll nail it. You are not alone in making this Apple Butter Pie, this is your flavor adventure!

Share your results! I am SO eager to see what you create! Let me know how you like my Apple Butter Pie version, and what your secret touches are!
Apple Butter Pie
This Apple Butter Pie combines the cozy flavors of homemade apple butter with a flaky, buttery crust for a delightful autumn dessert. Perfect for holidays or any special occasion, it’s a slice of pure comfort.
- Prep Time: 15 minutes
- Cook Time: 50 minutes
- Total Time: 65 minutes
- Yield: 8 servings
- Category: Dessert
- Method: Baked
- Cuisine: American
Ingredients
- 1 (14.1 ounce) package refrigerated pie crusts
- 1 cup apple butter
- 1/2 cup heavy cream
- 2 large eggs
- 1/4 cup granulated sugar
- 1 teaspoon vanilla extract
- 1/4 teaspoon ground cinnamon
- 1/8 teaspoon ground nutmeg
- Pinch of salt
Instructions
- Preheat oven to 375°F (190°C).
- Line a 9-inch pie plate with one pie crust. Crimp the edges.
- In a mixing bowl, whisk together apple butter, heavy cream, eggs, sugar, vanilla extract, cinnamon, nutmeg, and salt until smooth.
- Pour the apple butter mixture into the prepared pie crust.
- Top with the second pie crust. Cut slits in the top crust to allow steam to escape. Crimp the edges to seal.
- Bake for 45-50 minutes, or until the crust is golden brown and the filling is set. If the crust starts to brown too quickly, cover the edges with foil.
- Let cool completely before serving.
Notes
Serve warm with a dollop of whipped cream or a scoop of vanilla ice cream for an extra touch of indulgence.