
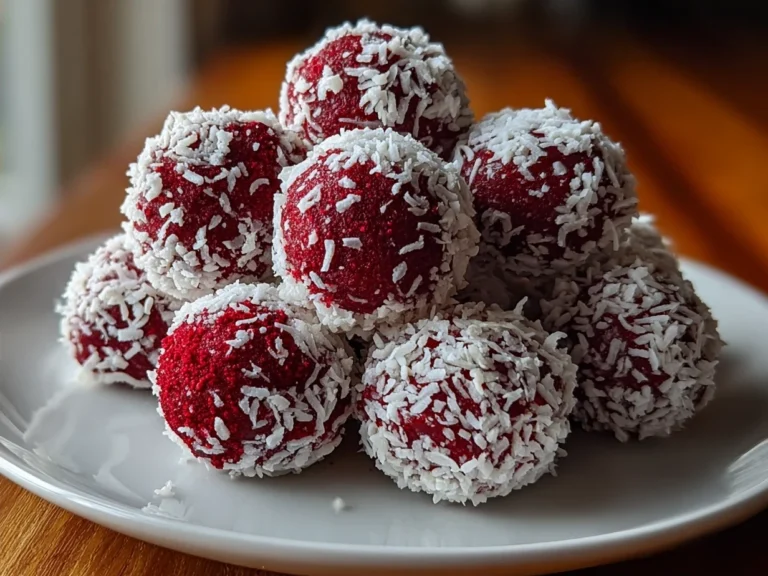
There was this exact moment when I first bit into a No-Bake Red Velvet Snowball Truffles that completely flipped my flavor world upside down. Picture me in my kitchen, late-night taste-testing marathon, drizzled with red velvet crumbs and powdered sugar, thinking: “This isn’t just dessert, it’s a bold flavor fiesta!” The sweet cream cheese tang combined with that fierce red velvet punch—unexpected but unforgettable. The texture? Silky soft inside with this powdery, snowball-like finish that makes your mouth light up with every bite. This No-Bake Red Velvet Snowball Truffles embodies everything Cuba Queen stands for: big, unapologetic flavors that don’t play it safe.
When I developed this No-Bake Red Velvet Snowball Truffles, I knew I found the holy grail of no-bake dessert balls. First, I tried versions that were too dry or too sweet, missing that velvet smoothness. But once I nailed the balance between cream cheese, real cocoa, and the perfect dusting of powdered sugar, it was game over. These snowball truffles dessert hits that sweet spot—soft, rich, and festive—as if every bite throws a party in your mouth. Later, when I dropped these easy holiday truffles at a family party, everyone stopped what they were doing and went in for seconds before I even finished the first round. That’s when the magic clicked: these red velvet cake balls don’t just satisfy—they captivate.
If you’re a flavor adventurer like me who lives for the bold and the beautiful, wait until you make these No-Bake Red Velvet Snowball Truffles. They’re easy, fast, and so celebration-worthy you’ll struggle to save any for later. Trust me, this red velvet truffle recipe is about to become your secret weapon for every holiday, party, or sweet craving moment.
Get ready—these No-Bake Red Velvet Snowball Truffles will change your dessert game forever. If this recipe rocks your world, you NEED to try the Halloween No-Bake Icebox Cake next for another flavor bomb!
INGREDIENTS You Need for This:
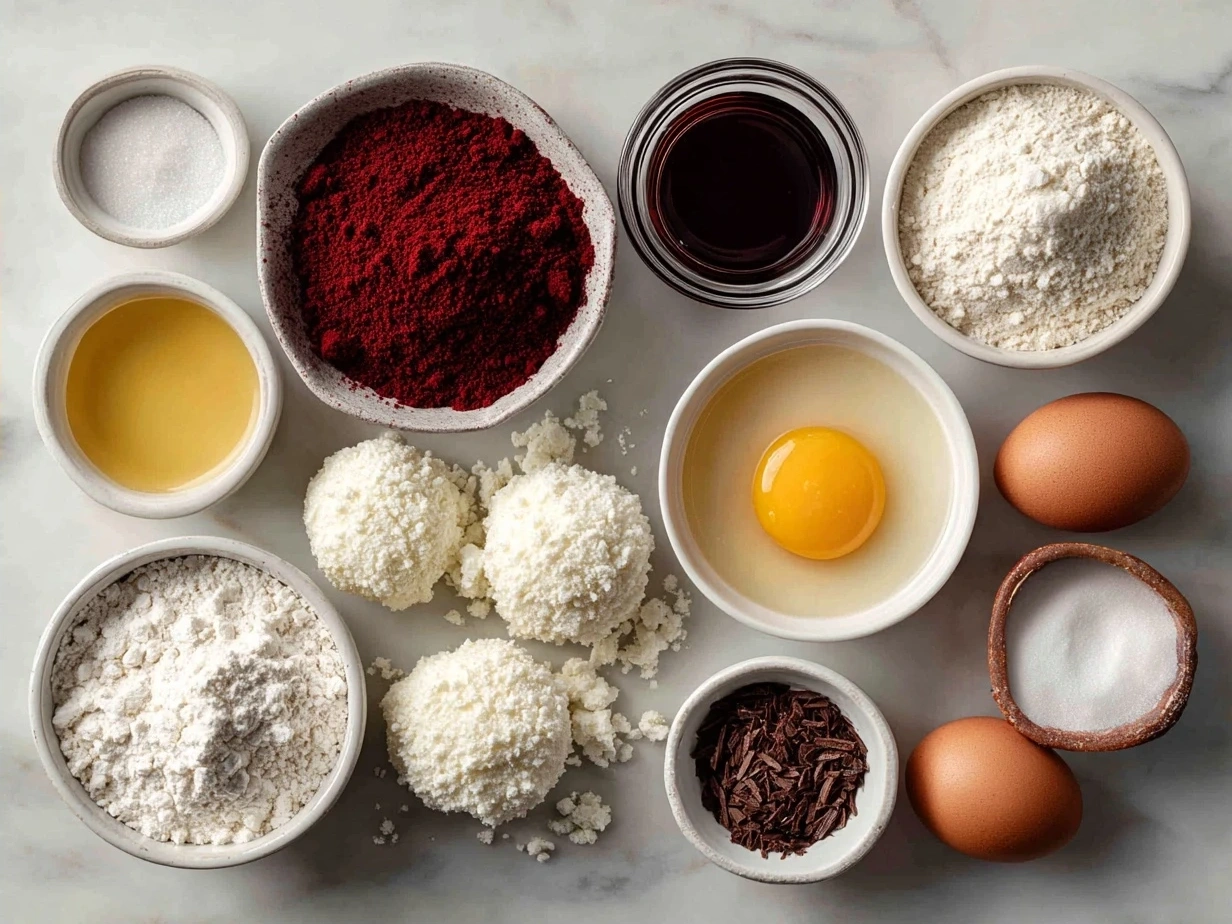
This No-Bake Red Velvet Snowball Truffles ingredient list is SHORT but mighty! Here’s what you’ll want on hand:
- 1 box (18 oz) of red velvet cake mix (you want quality here; I recommend a trusted brand for that classic cake flavor)
- 8 oz cream cheese, softened (the secret to epic No-Bake Red Velvet Snowball Truffles is using cream cheese instead of frosting alone—this ups the flavor depth and gives you that silky smooth texture)
- 1 cup powdered sugar, sifted (for that snowy coating and to dial in sweetness)
- 2 teaspoons vanilla extract (pure vanilla elevates your red velvet truffle recipe to bold new heights)
- 1/4 teaspoon salt (balances out the sugar and brightens flavors)
- Extra powdered sugar for dusting (this finishes your snowball truffles dessert with that iconic look)
Splurge on the cream cheese—it’s your flavor powerhouse here. You’ll find the best ingredients for this No-Bake Red Velvet Snowball Truffles at your local gourmet grocery or trusted online shops. If you’re tight on budget, swap the powdered sugar for a superfine sugar blend, but powder works best for that soft snowball effect.
Pro Power Tip: Chill your cream cheese ahead of time for easier mixing. Also, if you want a deeper cocoa hit in these easy holiday truffles, stir in a tablespoon of unsweetened cocoa powder—just don’t overdo it or your truffles get dry.
For a fun variation or budget-friendly hack, replace half the red velvet cake mix with chocolate cake mix. Joke’s on your taste buds—they’ll love it. Store your cake mix in an airtight container to keep your No-Bake Red Velvet Snowball Truffles fresh and your flavor adventure unhindered.
This legend of a recipe pairs perfectly with other sweet treats. For similar indulgent vibes, check out my Chocolate Protein Baked Oats for a breakfast dessert crossover or dive into a savory twist with the Loaded Baked Potato Soup as a wild contrast to the sweet snowball truffles.
STEP-BY-STEP INSTRUCTIONS:
Ready to make your kitchen the arena for the best No-Bake Red Velvet Snowball Truffles action? Follow my playbook:
- Combine Red Velvet and Cream Cheese
In a large mixing bowl, dump the entire box of red velvet cake mix and softened cream cheese. Ready your arm for a mix—that smooth blend between the tangy cream cheese and the vibrant cake mix is where magic begins. Don’t stress—your No-Bake Red Velvet Snowball Truffles are going to be incredible. - Add Vanilla and Salt
Stir in vanilla extract and salt until perfectly folded in. This step punches up the flavors and balances sweetness. Pro tip for No-Bake Red Velvet Snowball Truffles perfection: folding gently preserves that moist, cake-like texture without toughness. - Chill the Mixture
Pop this mixture in the fridge for 30 to 45 minutes. The cool downtime firms it up enough to roll. Don’t skip this or your snowball truffles dessert won’t hold their shape. In my kitchen, this No-Bake Red Velvet Snowball Truffles takes exactly 40 minutes to reach the ideal consistency. - Form Balls
Roll generous tablespoons of the chilled mixture into smooth balls. This is where your No-Bake Red Velvet Snowball Truffles transform into pure magic. Don’t worry if your first few aren’t perfect—taste-testing comes first, shaping second. - Dust with Powdered Sugar
Roll each truffle in powdered sugar to coat completely. This finishing snowball layer is what makes these red velvet cake balls stand out. If the powdered sugar clumps slightly, tap off excess gently. - Chill Again for Final Set
Let these bad boys chill another 20 minutes before serving. This step seals flavor and texture, locking in that celebration-worthy mouthfeel.
Troubleshooting: If your mixture feels too wet, add a tablespoon of cake mix to balance moisture. Too dry? A splash of milk tightens everything up without watering down the flavor.
Efficiency hack: While your No-Bake Red Velvet Snowball Truffles is chilling, snap shots for Instagram because these little beauties are legit glow-up material! Plus, catching that snowy white coating against their red velvet core is pure visual fireworks.
These snowball truffles dessert balls are ready to deliver bold flavors anytime you want an easy holiday truffles hit. For more no-bake inspiration, browse 25 Christmas Ball and Truffle Recipes on Lord Byron’s Kitchen for wild variations.
PRESENTATION:
People absolutely lose their minds when I serve this No-Bake Red Velvet Snowball Truffles at Christmas parties or weekend gatherings. Presentation here is simple but fierce. Use a white or red platter to let those snowball truffles pop visually. Sprinkle a few edible gold stars or fresh mint leaves around for that festive vibe.
Pair these No-Bake Red Velvet Snowball Truffles boldly with a glass of cold milk or a hot cup of espresso—the creaminess cuts through the tang, creating harmony. At a recent party, guests lined up for seconds, and one even said, “These are like the red velvet cake balls I’ve been dreaming of!” That reaction says it all.
For Instagram-worthy plating, try these tricks: stack the truffles pyramid-style on a cake stand dusted with powdered sugar, or nestle each in decorative paper cups with a dusting of cocoa powder or crushed peppermint for a seasonal twist.
Seasonal variations? I swapped powdered sugar for crushed pistachio crumbs and a sprinkle of chili powder—fiery crunch meets velvet softness. This lives on my easy holiday truffles list under “must-try.”
If you want more crowd-pleasers in the no-bake realm, check out Best Christmas Cookie and Candy Recipes to amp up your dessert game.
FAQs:
1. Can I make this No-Bake Red Velvet Snowball Truffles spicier?
Yes! Add a pinch of cayenne or chili powder in the mix to give a subtle kick. I tested this and the contrast between spicy and sweet blew minds without overwhelming the classic velvet flavor.
2. What if I don’t have red velvet cake mix?
Use vanilla or chocolate cake mix with a tablespoon of cocoa and red food coloring to get close. This tweak saved me during a late-night craving once—still bomb.
3. How do I know when my No-Bake Red Velvet Snowball Truffles is perfectly done?
Look for a mixture that holds shape but still feels soft. The balls shouldn’t crack or crumble when rolled. A quick taste after chilling is your ultimate checkpoint.
4. Can I freeze these snowball truffles dessert balls?
Absolutely. Freeze in airtight containers for up to 3 months. Thaw in the fridge before serving—they keep their snowball charm and bold taste.
5. How do I store leftover No-Bake Red Velvet Snowball Truffles?
Keep them chilled in an airtight container for up to a week. Powdered sugar might get sticky, so refresh with a light dusting before serving.
6. Can I customize the coating?
Sure! Swap powdered sugar for finely crushed nuts, shredded coconut, or cocoa powder for different textures. I love changing it depending on the mood or occasion.
7. Are these No-Bake Red Velvet Snowball Truffles suitable for gifts?
Yes! Pack them in decorative tins or clear boxes. Personally, gifting these has become my seasonal signature because everyone wants bold flavor, no fuss.
If you want more quick no-bake ideas, from fudge to spiced treats, peek at these easy No-Bake Fudge and Truffle Recipes. Flavor adventurers around the world rave about these for holiday magic.
CONCLUSION:
This No-Bake Red Velvet Snowball Truffles nails everything Cuba Queen stands for: bold flavor, easy prep, and celebration-worthy dessert moments every single time. When the cravings hit or guests arrive unexpectedly, you’ll reach for this recipe.
No-Bake Red Velvet Snowball Truffles Power Tips:
– Use softened cream cheese chilled in advance for smooth mixing.
– Chill between every step to lock texture and flavor in place.
– Don’t skip the powdered sugar roll; it’s THE finishing touch that seals the deal.
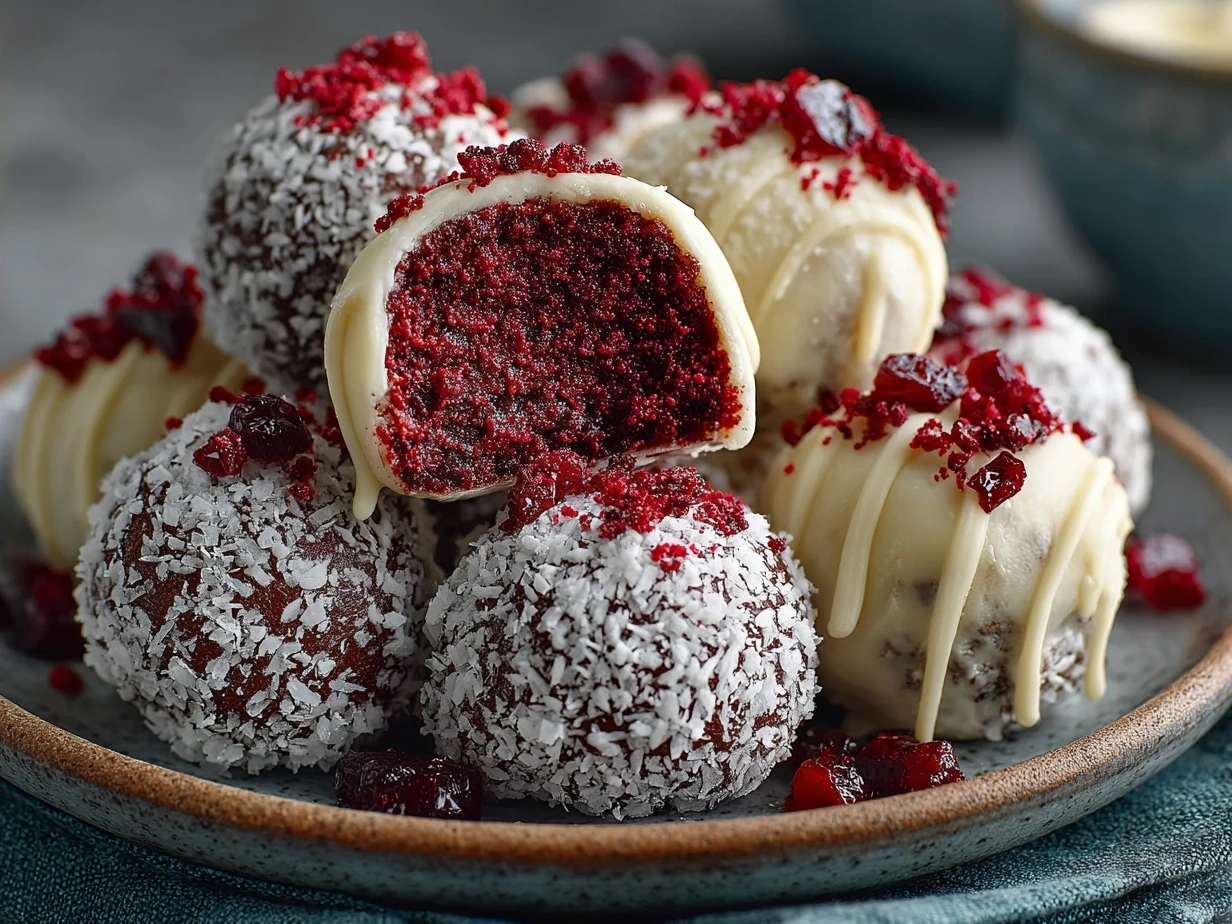
I’ve created versions with white chocolate drizzle, crushed peppermint coating, and even spiced cayenne infusions—all loved by the squad. But the classic red velvet cake balls dusted in snow-white sugar still get the biggest “Wow” shout-outs.
Make this No-Bake Red Velvet Snowball Truffles your signature dish and watch it bring bold smiles anytime. I’m confident you’ll nail these first try and have fun doing it.
Light up your kitchen with these flavor bombs and share your creations—I’m obsessed with seeing your truffle glow-ups!
Ready to keep your flavor adventures rolling? Don’t miss the Chocolate Protein Baked Oats and warm up with my Loaded Baked Potato Soup next!
Let’s keep those big, satisfying flavors coming!
No-Bake Red Velvet Snowball Truffles
Delightfully rich and creamy, these No-Bake Red Velvet Snowball Truffles combine classic red velvet flavors with a melt-in-your-mouth texture, perfect for an elegant dessert or festive treat.
- Prep Time: 15 minutes
- Cook Time: 0 minutes
- Total Time: 75 minutes
- Yield: 20 truffles
- Category: Dessert
- Method: No-Cook
- Cuisine: American
Ingredients
- 1 1/2 cups red velvet cake crumbs
- 4 oz cream cheese, softened
- 1/2 cup white chocolate chips, melted
- 1 tsp vanilla extract
- Powdered sugar, for rolling
- Optional: extra white chocolate for drizzling
Instructions
- In a bowl, combine the red velvet cake crumbs and softened cream cheese until fully blended.
- Stir in the melted white chocolate chips and vanilla extract until smooth.
- Chill the mixture in the refrigerator for 30 minutes to firm up.
- Using a small spoon or cookie scoop, form the mixture into 1-inch balls.
- Roll each ball generously in powdered sugar to coat completely.
- Place the truffles on a parchment-lined tray and refrigerate for at least 1 hour before serving.
- Optional: Drizzle with extra melted white chocolate for a decorative finish.
Notes
For a festive touch, add crushed pecans or sprinkles to the powdered sugar coating before chilling.